What Floridians Make From Longleaf Pine Cones, The Biggest Cones In The South
A longleaf pine cone lands on your lawn with a thud, and it’s roughly the size of a small pineapple. Most people kick it aside.
Crafty Floridians do the opposite. They scoop up armloads every fall, haul them home, and turn what looks like yard waste into things that earn compliments and sometimes cold hard cash.
Nobody hands out the recipe, so the ideas travel by word of mouth.
These cones are the biggest of any pine in the South, which gives them a head start over the skinny ones from your neighbor’s tree. Bigger means more to work with, and more to work with means more room for imagination.
A few projects take ten minutes and no skill at all. Others need a little patience and a steady hand.
Fill a bucket before the squirrels beat you to it.
1. Build A Bold Pine Cone Wreath
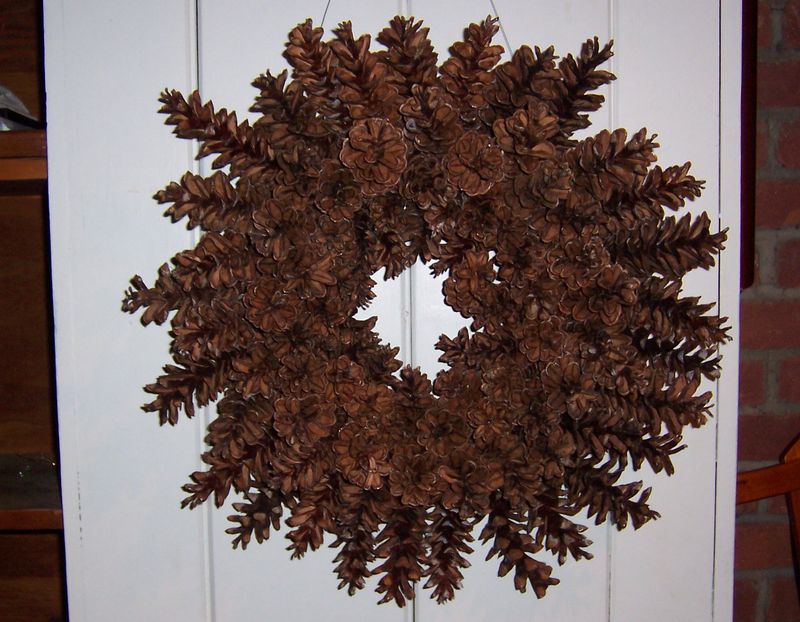
Hang one of these on your front door, and neighbors will stop to stare. A wreath made from longleaf cones looks big, bold, and a little bit wild.
Since each cone can stretch up to ten inches, you need fewer of them than you might guess.
Start with a sturdy wire wreath frame from a craft store. Thin cones from other trees can sit on foam with hot glue, but these heavy ones need more support.
Floral wire is your best friend here.
Wrap a piece of wire around the bottom scales of each cone. Then twist the ends tightly onto the frame.
Work in a circle, tucking cones close together so no gaps show.
Some crafters use a clever trick with water. They soak the cones until the scales fold shut, then press them into the wire form.
As the cones dry, the scales spread open and lock themselves in place.
Once your wreath is filled, step back and check the shape. Add smaller cones in any empty spots if you have them.
A few sprigs of greenery or a plaid bow can add a pop of color.
Want your wreath to last for years? Spray it with a clear acrylic coating outdoors.
The coat adds a soft shine and helps protect the scales from crumbling.
Here is a fun fact to share with guests. Pine cones open and close with the weather, so humid Florida air can make them tighten up.
Display your wreath under a porch roof or inside where rain cannot reach it.
Kids can help too, as long as an adult handles the sharp wire ends. Wearing garden gloves keeps prickly scales from poking little fingers.
Before long, your family will have a handmade treasure that welcomes everyone who visits your home.
2. Turn Single Cones Into Holiday Ornaments
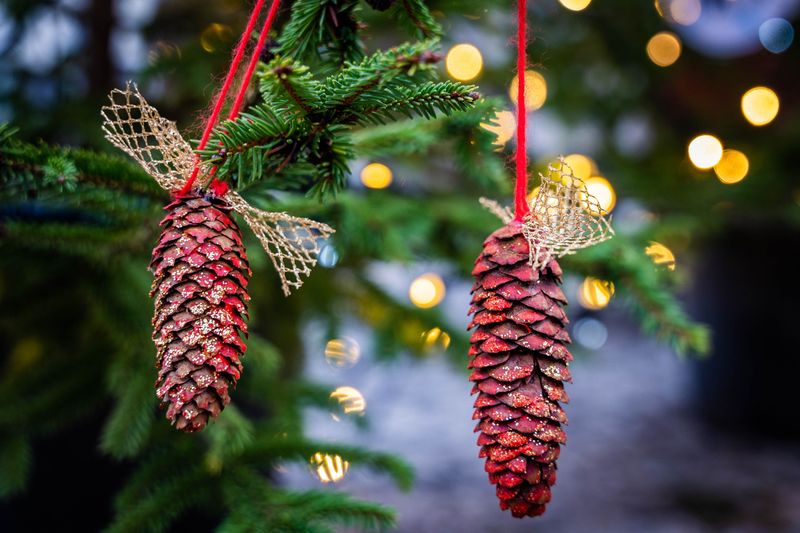
Grandma had a shoebox full of them, each one a little sparkly and a little lopsided. Every December, those homemade pine cone ornaments came out before anything store-bought.
Plenty of Florida families keep that tradition going today.
Making one takes about fifteen minutes. A single longleaf cone is big enough to stand out on any tree branch.
Your Florida Garden Changes Every Week. Your Plan Should Too.
Gardening in Florida changes quickly throughout the season. Every Friday you’ll receive a simple weekly plan showing exactly what to plant, prune, fertilize, harvest, and protect so you never miss the right timing.
Smaller trees may need lighter cones, so pick sizes that match your branches.
First, clean your cone with a soft brush to knock off loose dirt and needles. Bake it on a foil-lined tray at around 200 degrees for about an hour.
The heat dries out sap and chases away tiny bugs hiding between the scales.
Now comes the fun part. Dab glitter glue along the tips of the scales so they catch the twinkle lights.
White paint can make them look snowy, which is a cute joke in a state that rarely sees snow.
Next, add a few little extras. A tiny bow, some fake berries, or a sprig of greenery near the top gives the ornament charm.
Hot glue holds these pieces well, but let an adult manage the glue gun.
For hanging, wrap a short piece of wire or ribbon around the top scales. Twist it into a loop and tie it snugly.
Give it a gentle tug to make sure it holds the weight.
These ornaments also make sweet gifts. Write a name and year on a small paper tag and tie it to the loop.
Teachers, grandparents, and friends love presents made by hand.
Store them in egg cartons or tissue paper after the holidays. With a little care, your ornaments can sparkle for many seasons and become part of your own family story.
3. String Them Into A Rustic Garland
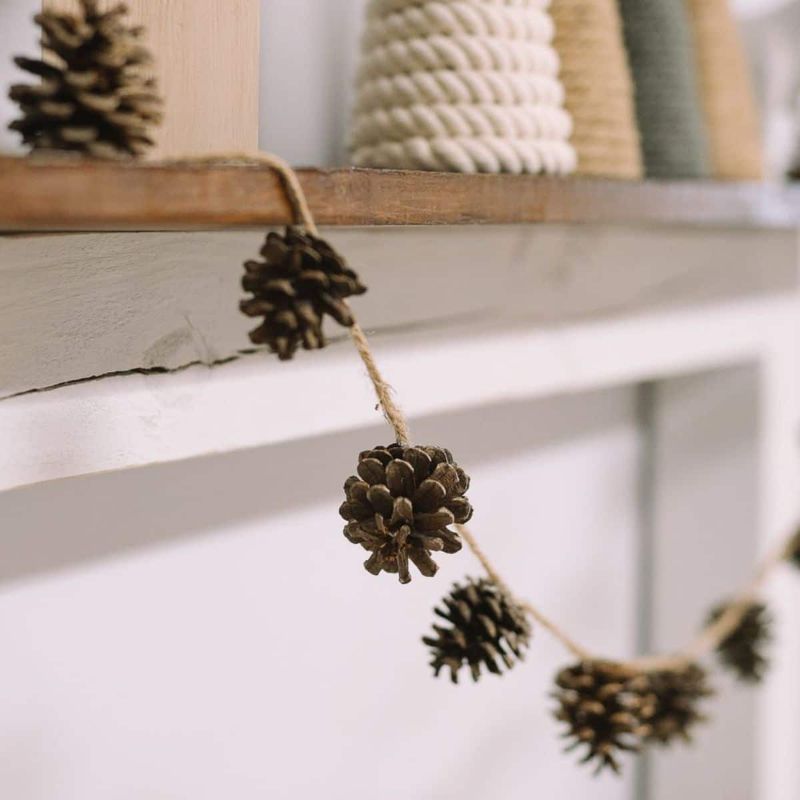
Okay, confession time. The first garland I made drooped like a tired hammock because I used flimsy yarn.
Learn from my mistake and pick a strong rope from the start.
Longleaf cones are heavy, so twine, jute, or burlap rope works best. Measure the space you want to decorate, like a mantel or staircase.
Add an extra foot or two so the garland can swoop nicely.
Before anything else, bake your cones at a low temperature for about an hour. That step dries them out and gets rid of hidden critters.
Nobody wants a surprise spider crawling across the living room.
Next, you have two easy choices for attaching the cones. You can twist a small piece of floral wire around the top scales of each cone.
Then wrap the wire ends onto your main rope.
The second option uses little screw eyes, the tiny metal loops found at hardware stores. Twist one into the top of each cone like a mini screw.
Thread your rope through the loops, and the cones slide right on.
Spacing matters more than you might think. Leave about three or four inches between cones so the garland looks full but not crowded.
Tie small knots on each side of a cone to keep it from sliding around.
Feeling creative? Mix in wooden beads, dried orange slices, or strips of plaid fabric between the cones.
These extras add color and make your garland feel extra cozy.
Hang it with sturdy hooks rather than tape, since the weight adds up fast. Your garland can stay up from fall through winter.
Swap the extras each season for a fresh look without starting over.
4. Arrange Big Cones Into A Holiday Centerpiece

Ninety seconds. Seriously, that is about how long it takes to build a basic pine cone centerpiece.
If you have a bowl and a pile of cones, you are halfway done already.
Grab a shallow bowl, a wooden tray, or a rustic dough bowl. Wide containers work better than tall ones because the cones need room to sprawl.
Lay the biggest longleaf cones down first to build a strong base.
After that, fill in gaps with smaller cones from other pines if you have them. Mixing sizes adds texture and makes the display look more natural.
Turn some cones on their sides so the pattern feels relaxed.
Here is where you can really have fun. Tuck in bright red berries, sprigs of cedar, or slices of dried orange.
Cinnamon sticks add a warm smell that drifts across the room.
Candles make the whole thing glow. Set a few pillar candles or jar candles in between the cones.
Battery candles are the safer pick, especially around dry cones and curious kids.
A real flame should sit inside a glass holder and stay well away from scales. Never leave it burning when nobody is home.
Safety first keeps the holiday cheerful.
Want a coastal Florida twist? Add a few seashells or a sprinkle of white sand around the edges.
It blends beach life with woodland charm in a way visitors will remember.
Once the holidays wrap up, switch the berries for something new. Spring flowers or bright citrus can turn the same cones into a fresh display.
Your centerpiece can earn its spot on the table all year, and guests will keep asking where you found such giant cones.
5. Dip Them In Wax For Fireplace Fire Starters
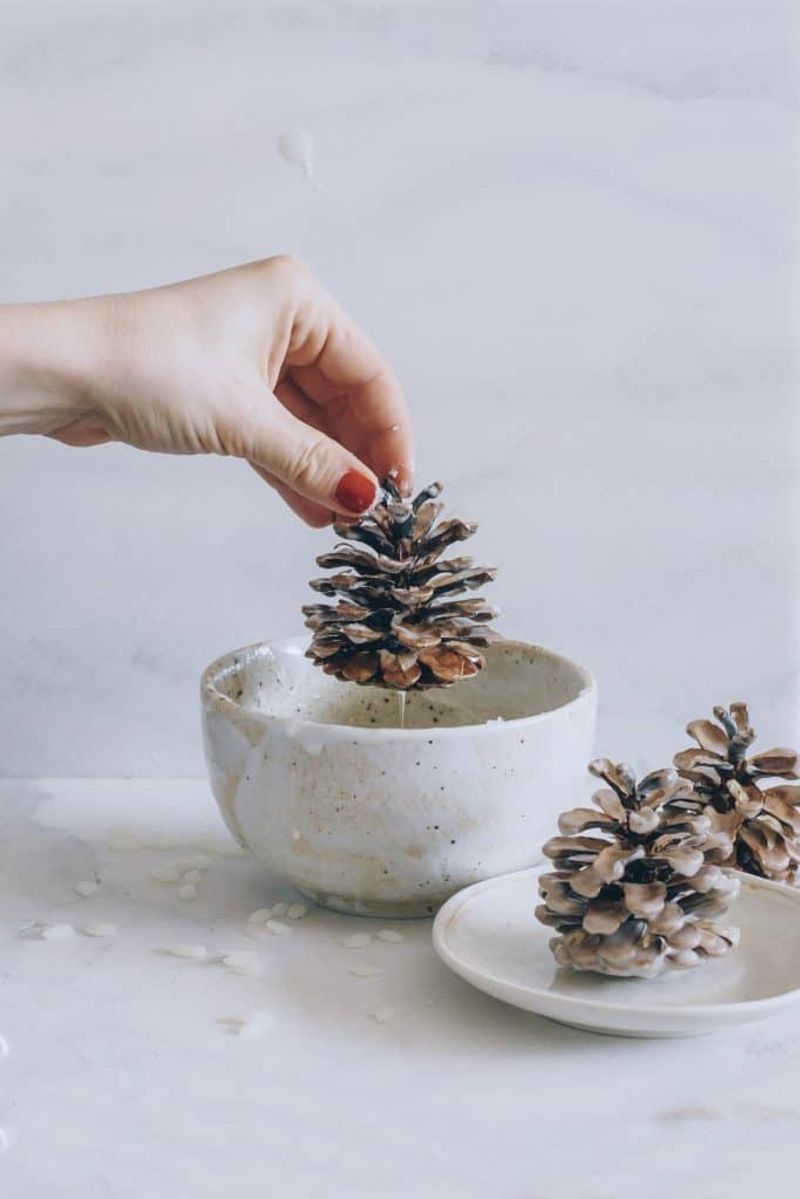
Long before matches came in neat little boxes, pioneers tossed pine cones on the fire to get it roaring. The resin inside burns hot and fast.
Wax-dipped cones take that old idea and make it even better.
Beeswax is a favorite choice for this project. It burns cleanly and gives off a gentle honey smell.
Paraffin wax also works and usually costs less.
Start by baking your cones at a low heat for about an hour. This dries them out and removes any bugs.
Dry cones catch fire much more easily than damp ones.
Melt your wax slowly using a double boiler or an old can set in a pot of simmering water. Wax can get dangerously hot, so an adult should handle this step.
Keep the heat low and never leave it alone.
Before dipping, wrap a cotton or jute string around the top of each cone. Leave a tail hanging out to act as a wick.
Later, you will light this string to get things started.
Hold the cone by the string and dip it into the melted wax. Lift it out and let it cool for a minute on wax paper.
Repeat three or four times for a thick, long-lasting coat.
Want a little extra flair? Sprinkle dried herbs, cinnamon, or crushed orange peel onto the wet wax.
They add color and a lovely scent when burned.
Store the finished starters in a basket near the fireplace. Wrapped in burlap with a ribbon, they also make handy gifts for campers.
One cone tucked under kindling is often enough to coax a crackling fire to life on a chilly Florida night.
6. Spread On Peanut Butter And Seed For A Bird Feeder
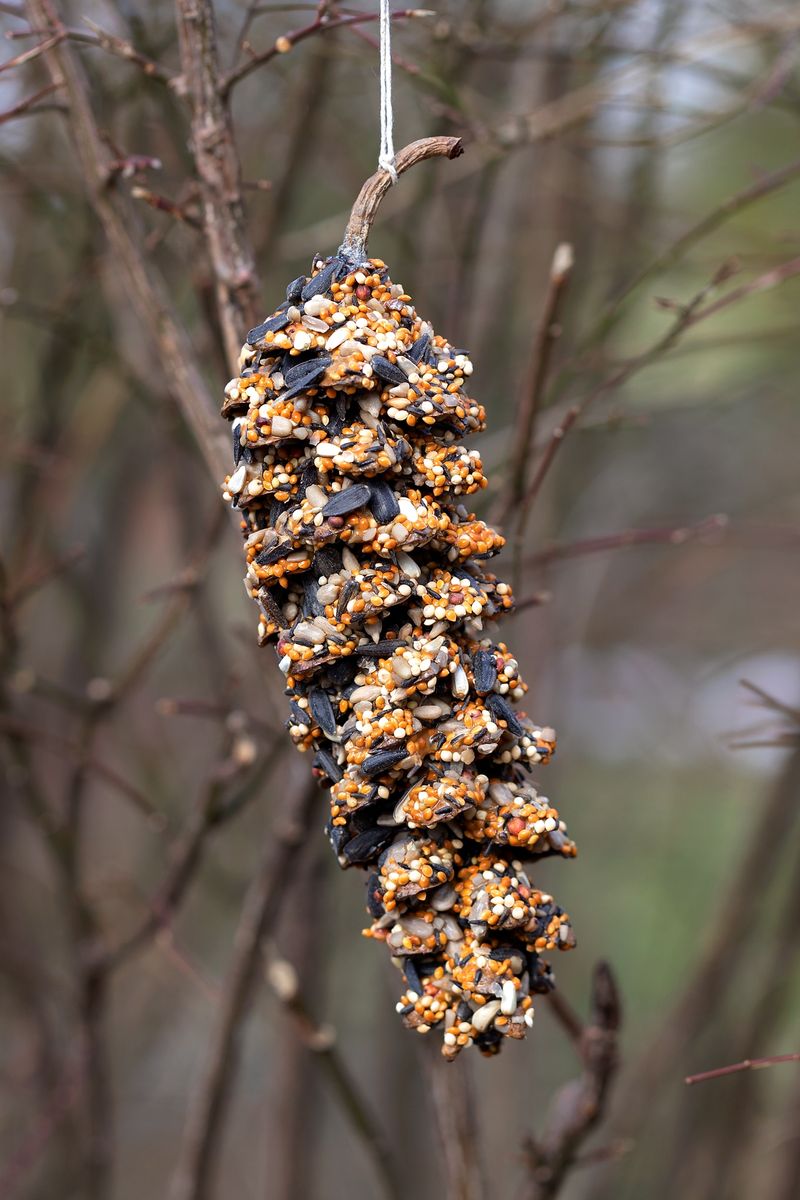
Cardinals, chickadees, and blue jays all have one thing in common. They go wild for a sticky snack hanging from a tree branch.
A pine cone feeder is like a fancy buffet for your feathered neighbors.
Longleaf cones make super feeders because their deep scales hold tons of food. One cone can feed hungry birds for days.
That means more chances for you to watch them up close.
Gather a cone, a butter knife, peanut butter, birdseed, and some string. Lard or vegetable shortening works too if someone in your house has a peanut allergy.
Lay down newspaper first, since this project gets messy.
Tie your string around the top of the cone before adding any food. Doing it later is a gooey headache.
Make a loop big enough to slip over a branch.
Now spread peanut butter all over the cone. Push it deep into the gaps between the scales with the knife.
Don’t be shy, because more spread means more seeds will stick.
Pour birdseed into a pie pan or shallow dish. Roll the coated cone through the seeds and press gently with your hands.
Let it rest for about an hour so everything sets.
Pick a hanging spot near a window where you can watch the action. Try to choose a branch that squirrels cannot easily reach, though they are sneaky.
Keep the feeder in the shade on hot days so the spread does not melt.
Here is a cool idea for curious minds. Keep a notebook and write down every bird species that visits.
Over a few weeks, you might be amazed by how many different birds stop by your yard for a tasty treat.