What To Do First When Chinch Bugs Hit A Texas Lawn This Summer
Texas lawns know how to start drama fast.
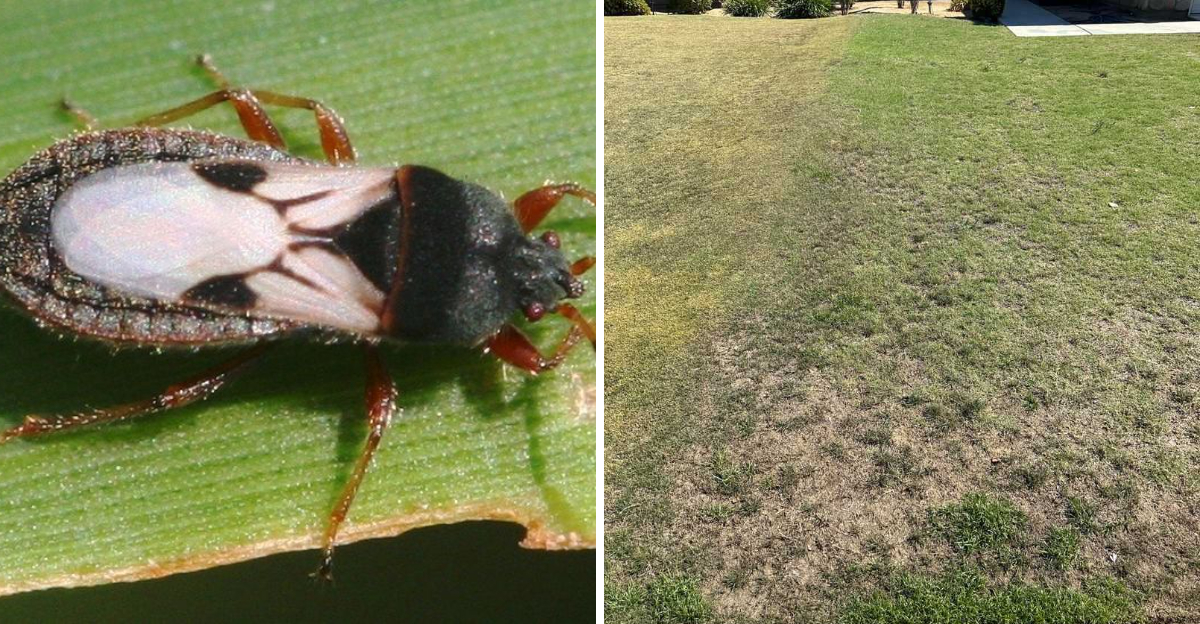
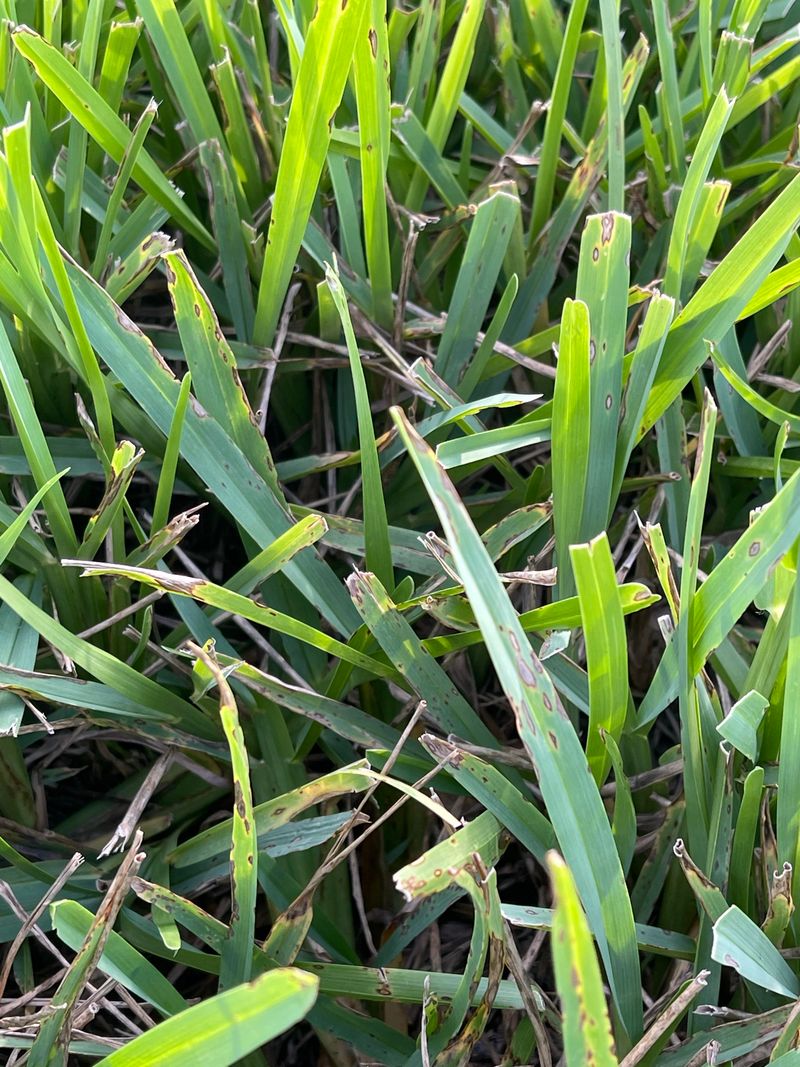
Monday, the St. Augustinegrass looks fine. Friday, the edge by the driveway has turned yellow, crispy, and suspiciously patchy.
Naturally, the heat gets blamed first.
That is fair. Texas summer can make any lawn look personally offended by the sun. But chinch bug damage can wear the same disguise, especially near sidewalks, driveways, and hot dry edges where grass already feels stressed.
That is where guessing gets expensive.
Water a chinch bug problem, and the insects keep feeding. Spray a drought-stressed lawn for bugs that are not there, and the grass stays miserable while your wallet joins the damage report.
So what should Texas homeowners do before reaching for the hose or pesticide?
Start with diagnosis. Look at the pattern, check the soil, inspect the thatch, and confirm the insects before taking action.
The right first step saves the lawn from a summer-long guessing game.
1. Confirm Bugs Before Treating
Skipping straight to treatment without knowing what you are actually dealing with is one of the most common lawn mistakes Texas homeowners make every summer.
You might waste money on the wrong product, stress your grass further, and still have the same problem two weeks later. Proper identification is the starting point for everything else.
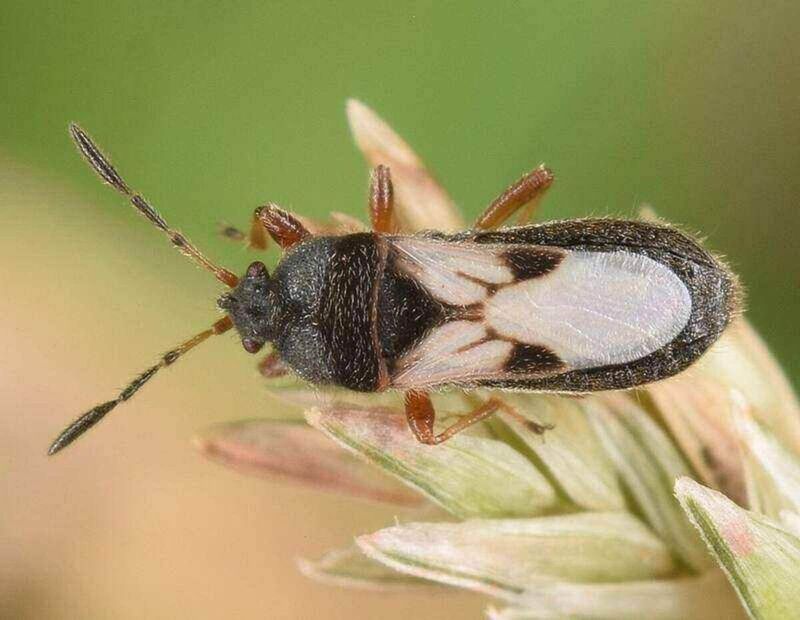
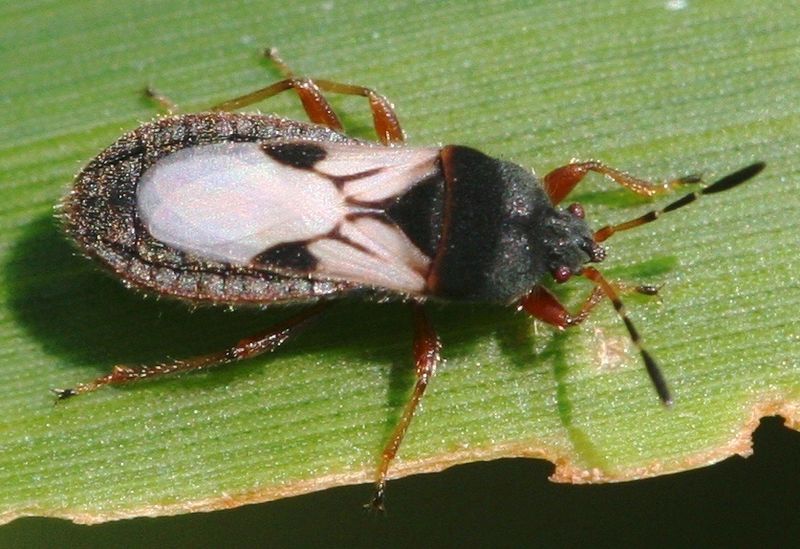
Chinch bugs are tiny insects, roughly the size of a watermelon seed, that feed on St. Augustinegrass by sucking out plant fluids and injecting a toxin that blocks water movement inside the grass blade.
Adults are black with white wings folded flat across their backs. Young nymphs are bright red with a white stripe across their middle. Both stages cause serious turf damage during hot, dry Texas summers.
Texas A&M AgriLife Extension recommends confirming the pest before any treatment begins.
You can part the grass at the edge of a damaged area and look near the soil surface in bright sunlight. Chinch bugs are fast movers and will scatter quickly, so look carefully along the thatch layer. A hand lens or magnifying glass helps a lot here.
Misidentifying drought stress, brown patch fungus, or grub damage as a chinch bug problem leads to unnecessary pesticide use that can harm beneficial insects and create resistance over time.
Take five minutes to confirm what you have before you spend a dime.
2. Check Sunny Stressed Patches First
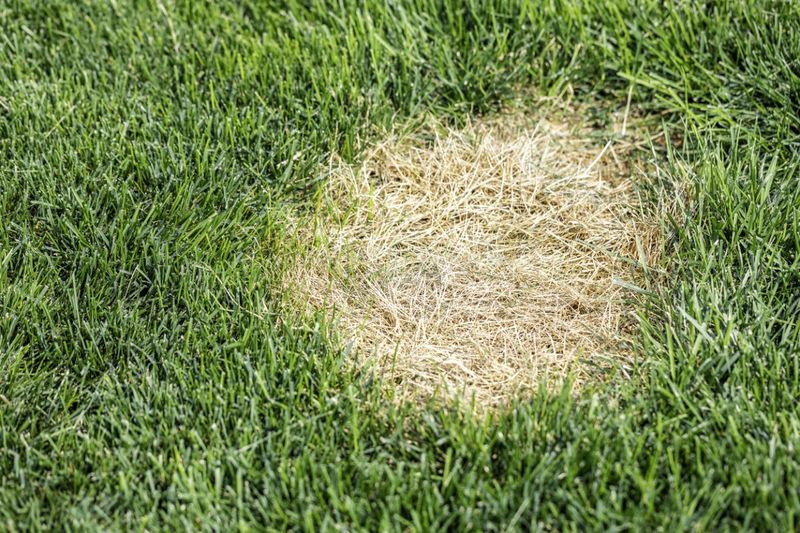
That crispy patch baking near the driveway or along the south-facing fence line is not random.
Chinch bugs are sun lovers, and they thrive in the hottest, driest corners of your yard. If your lawn has a spot that always seems to struggle in July and August, that is exactly where you should start your inspection.
St. Augustinegrass under heat stress is like a buffet sign for chinch bugs.
The insects congregate in areas with full sun exposure, compacted soil, and low moisture. They rarely start in shaded or well-irrigated zones.
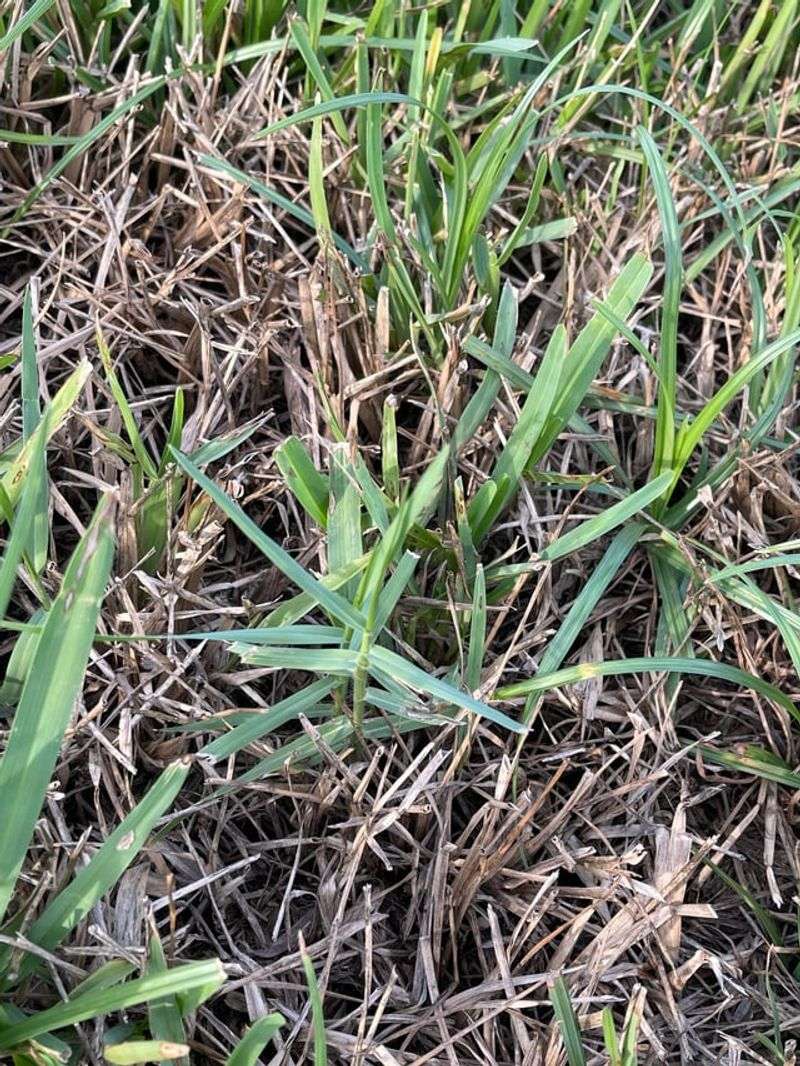
Damage often begins as small, irregular yellow patches that quickly turn straw-colored as the grass blades collapse.
The edges of driveways, sidewalks, and curbs absorb and radiate extra heat, making those border zones prime chinch bug territory all summer long.
Your Texas Garden Changes Every Week. Your Plan Should Too.
Gardening in Texas changes quickly throughout the season. Every Friday you’ll receive a simple weekly plan showing exactly what to plant, prune, fertilize, harvest, and protect so you never miss the right timing.
Get into the habit of walking your lawn perimeter every few days during peak summer heat, roughly June through September in most Texas regions.
Pay close attention to spots that dry out faster than the rest of the yard. Those areas are your early warning system.
Catching a chinch bug infestation while it is still a small patch in one corner is much easier to manage than dealing with damage that has spread across half the lawn.
3. Use The Coffee Can Test
A regular metal coffee can might be the most underrated lawn tool in your garage.
This simple trick, recommended by Texas A&M AgriLife Extension, can bring hidden chinch bugs right to the surface so you can count them and confirm whether you have a real infestation on your hands.
Cut both ends off a large metal coffee can so you have an open cylinder.
Press one end about two to three inches into the soil at the edge of a suspicious patch, right where healthy turf meets the yellowing zone.
Fill the can with water and keep it topped off for about five minutes. Chinch bugs float, so if they are present, you will see tiny insects rising to the water surface within a minute or two.
Count what you find. According to Texas A&M AgriLife Extension guidelines, finding 20 or more chinch bugs per square foot suggests a damaging population that likely needs treatment.
Run this test in two or three spots around the suspicious area to get a better picture of how widespread the population is.
A single can test in one location might miss a hotspot just a few feet away. The coffee can method is free, fast, and surprisingly accurate. It beats guessing every single time.
4. Inspect The Yellow Edge
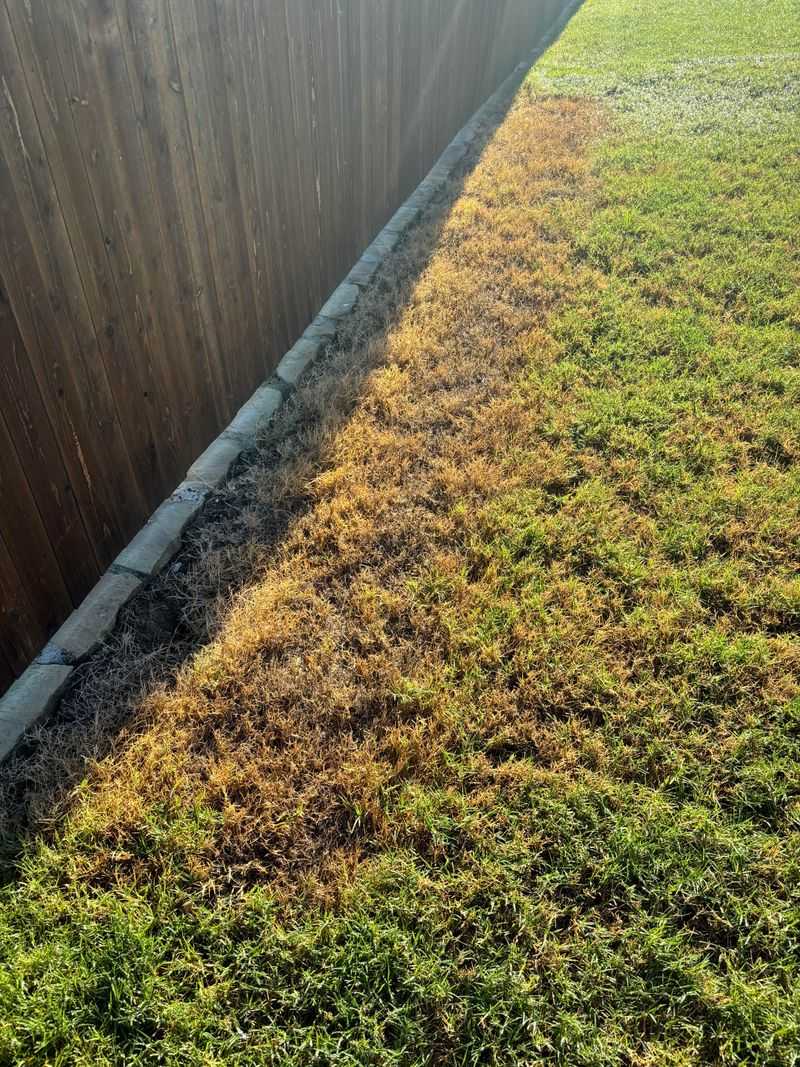
The yellow edge is where the action is.
That thin, irregular line separating your healthy green turf from the straw-colored damaged zone is not just a visual clue.
It is the active feeding front where chinch bugs are working right now, and it is the most important place to focus your inspection.
Chinch bugs do not spread evenly across a lawn all at once.
They move outward from a central hotspot, feeding as they go. The damage behind them looks dried out, while the turf just ahead of them is starting to yellow and wilt.
That transitional zone, the yellow edge, is where live insects are most concentrated.
Parting the grass blades right along that border and looking down near the soil surface will give you the best chance of spotting active nymphs and adults.
Bright midday sunlight is your best friend during this inspection. Chinch bugs are more active and easier to spot when temperatures are high.
Early morning inspections in cool shade can give you a false negative because the insects tend to move deeper into the thatch when conditions are cool.
Mark the edge with a small flag so you can check back in a week and see whether the damage border has moved outward, stayed put, or started to recover.
5. Water Deeply Before Blaming Drought
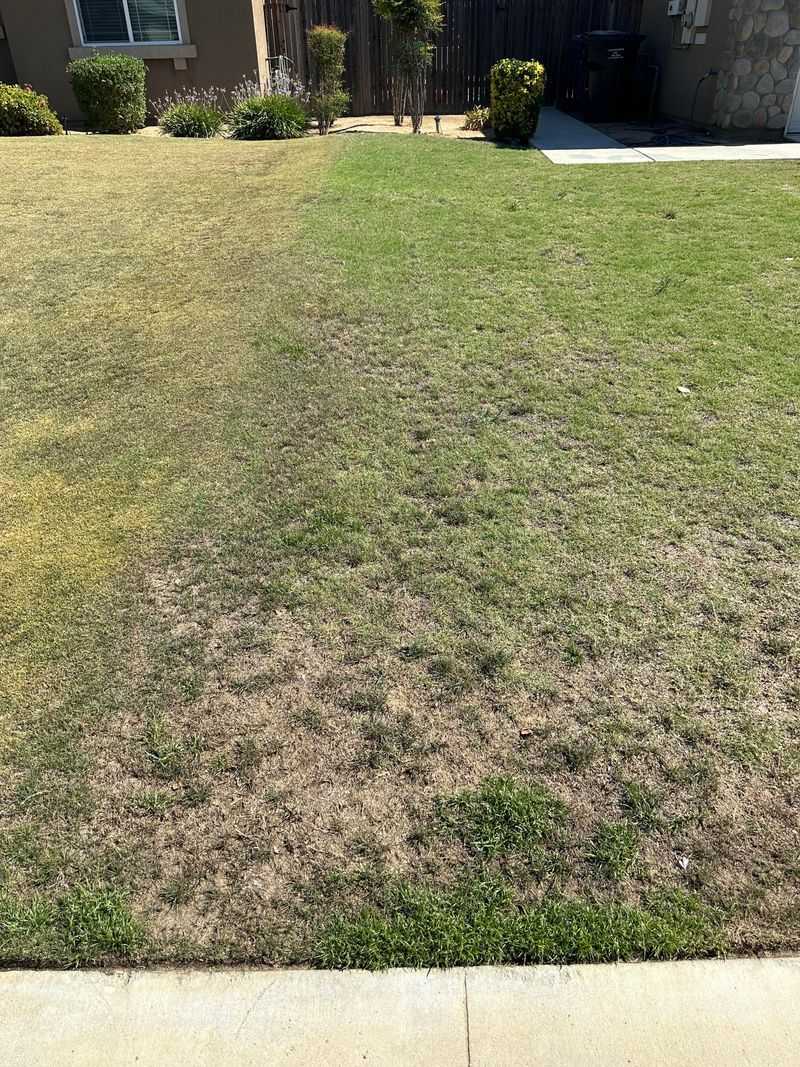
Before you call it a chinch bug problem, rule out the obvious suspect first.
Texas summers are brutal, and drought stress looks almost identical to chinch bug damage in the early stages.
Both cause yellowing, wilting, and eventual browning of St. Augustinegrass blades, and both tend to show up in the hottest parts of the yard.
The key difference is how the grass responds to deep watering.
If your lawn is simply thirsty, a thorough soaking of about one inch of water applied slowly will show visible improvement within 24 to 48 hours. Drought-stressed grass will perk back up, regain some color, and stop wilting.
Chinch bug-damaged grass will not recover with water alone, because the insects have already blocked the grass plant’s ability to move water through its own tissue.
Texas A&M AgriLife Extension recommends watering St. Augustinegrass deeply but infrequently, roughly once or twice a week during summer depending on rainfall.
Check your irrigation system for broken heads or uneven coverage before assuming insects are the culprit.
A zone that is not firing correctly can create a dry patch that looks suspiciously like pest damage. Water first, wait two days, then reassess what you are dealing with.
6. Manage Thatch With Care
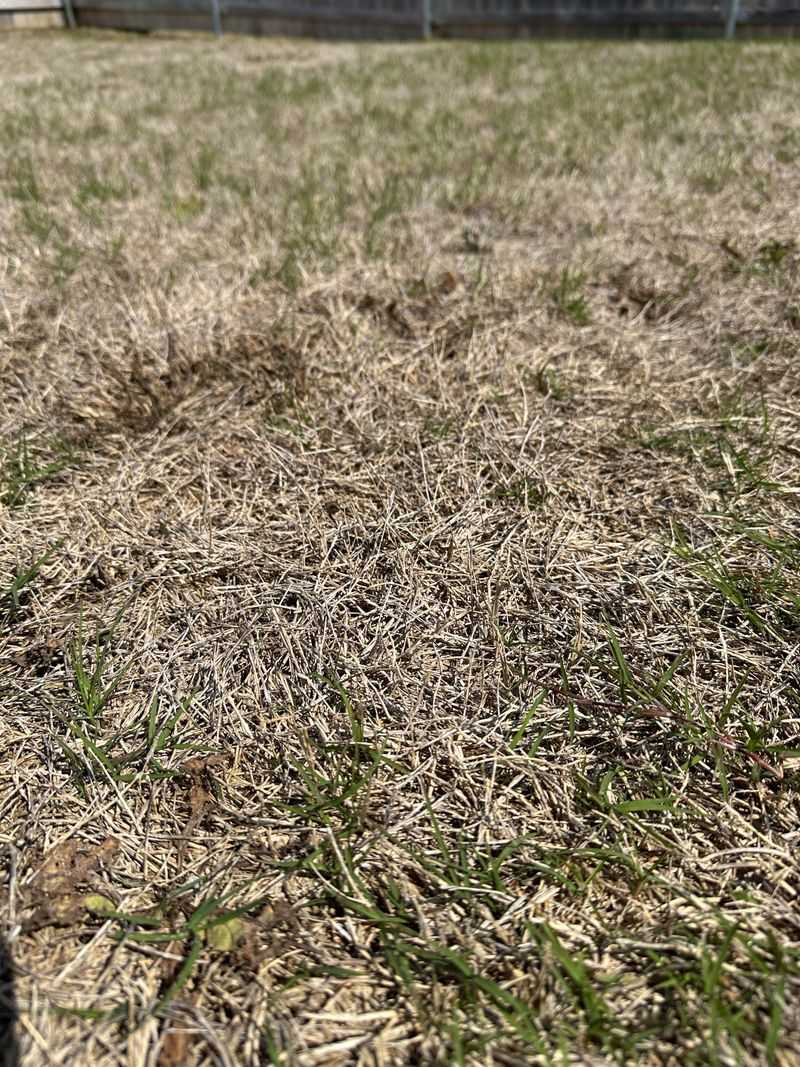
A thick thatch layer is basically a five-star hotel for chinch bugs.
That spongy mat of dead stems, roots, and organic matter that builds up between the soil surface and the green grass blades is exactly where chinch bugs hide, breed, and ride out dry spells.
Managing thatch is not just about lawn aesthetics. It is a real part of chinch bug prevention.
St. Augustinegrass is naturally prone to thatch buildup, especially when it receives heavy nitrogen fertilization or grows vigorously during warm months.
A thatch layer thicker than about half an inch starts to create problems. It reduces water and nutrient penetration, raises soil temperatures, and shelters pest populations from both natural predators and contact insecticides.
Chinch bugs can complete their entire life cycle inside a thick thatch layer without fully exposing themselves to treatment.
Core aeration and dethatching in early spring or fall, when the lawn is not already stressed, can help keep thatch at a manageable level.
Avoid over-fertilizing with high-nitrogen products during summer, as rapid lush growth feeds thatch accumulation fast.
A lawn with a healthy, thin thatch layer is simply harder for chinch bugs to colonize in the first place.
7. Treat Only Active Areas
Spraying your entire lawn because you found chinch bugs in one corner? No, don’t do that.
Blanket pesticide applications are costly, hard on beneficial insects like big-eyed bugs that naturally prey on chinch bugs, and unnecessary when damage is limited to a specific zone.
Targeted spot treatment of active areas is the smarter approach.
Once you have confirmed chinch bugs using the coffee can test and identified the active yellow edge, treat just that zone plus a buffer of two to three feet of healthy-looking turf around it.
This buffer matters because chinch bugs at the outer edge of the feeding front may not yet show visible damage but are actively moving.
Texas A&M AgriLife Extension recommends several insecticide options for chinch bug control in Texas lawns, including bifenthrin and other pyrethroids labeled for turfgrass use.
Always read the product label fully before applying. Avoid treating during the hottest part of the day to reduce grass stress and improve product performance.
Rotating between insecticide classes across seasons also helps prevent chinch bug populations from developing resistance to a single active ingredient over time.
8. Recheck The Border In A Week
Putting down a treatment and walking away is a mistake a lot of homeowners make.
Chinch bugs are persistent, Texas summers are long, and a single application does not always close the deal.
Coming back to check the yellow edge about seven days after treatment is one of the most important steps in the whole process.
When you return to the border, look for two things.
First, check whether the yellow edge has stopped moving. If the damage zone is the same size or smaller than it was before treatment, that is a good sign the population is being managed.
Second, look for new live insects along that same edge using the coffee can test or a direct visual check.
Also watch for early signs of grass recovery in treated areas.
St. Augustinegrass can bounce back from chinch bug damage if the stolons, those above-ground runners, are still alive and the soil has not been baked dry. New green growth at the base of damaged plants is a hopeful sign.
Staying on top of follow-up scouting through the end of summer is what separates a lawn that fully recovers from one that needs resodding in September.