Your New York Peace Lily Is Turning Brown This Fall, And The Fix Is Easier Than You Think
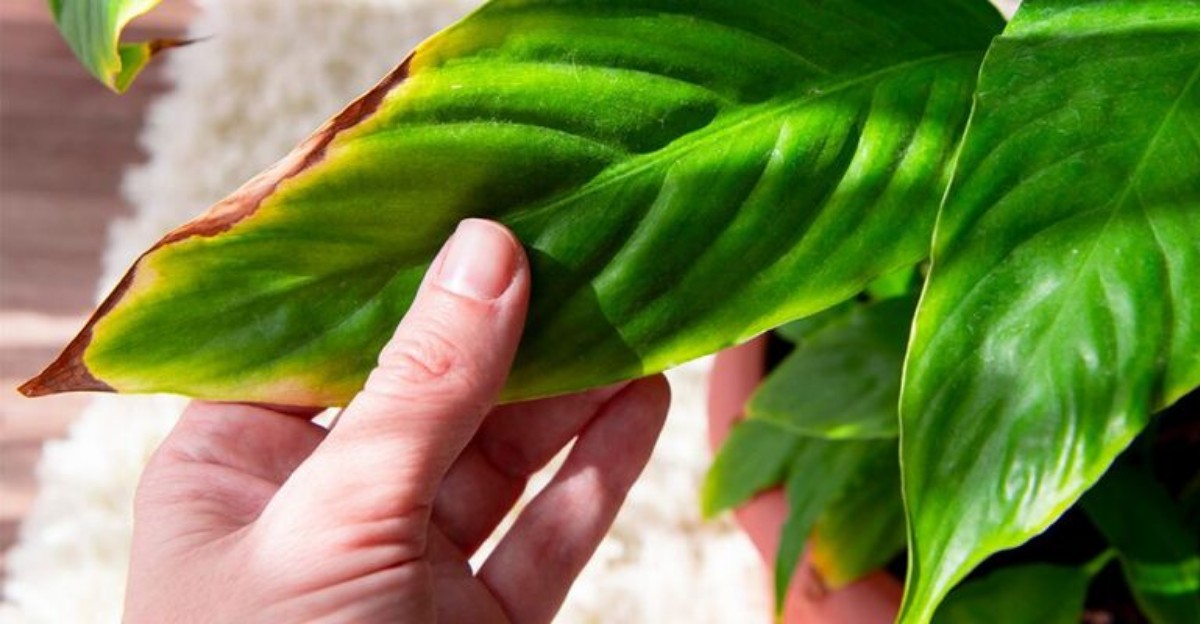
Nothing ruins a cozy fall morning like spotting crispy brown tips on your favorite peace lily. One day it looks glossy and proud, and the next it resembles a forgotten salad.
In New York apartments, the cause is often hiding in plain sight. Radiators hiss to life, windows leak chilly air, and tap water carries a few surprises.
Your plant is basically sending a note that something in its space needs a tweak. Luckily, peace lilies are forgiving and push out healthy new leaves fast with the right care.
The fixes below match each common cause with a quick solution. Once you know what your leafy roommate is trying to say, keeping it happy gets much easier.
1. Snip Off Brown Leaves At The Base
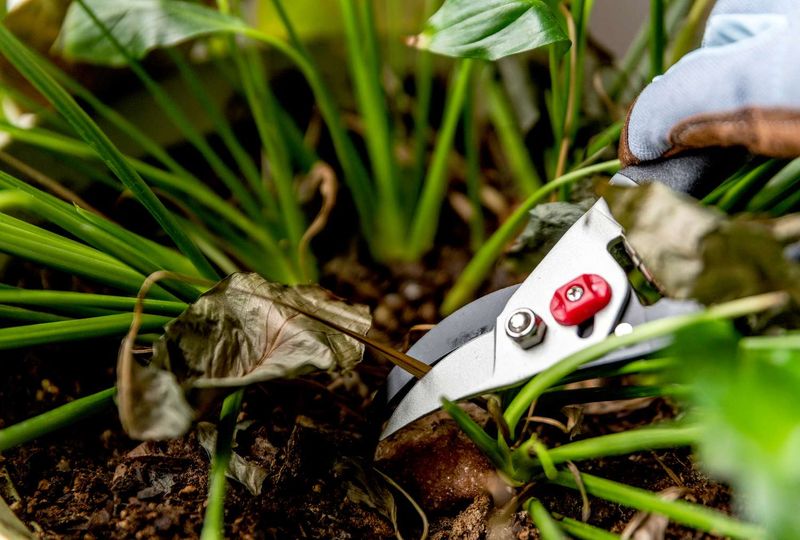
Grab your sharpest pair of scissors, because the first fix is a quick haircut. Brown leaf tips on a peace lily will not turn green again, sadly.
Leaving damaged leaves in place makes the plant spend energy on parts that cannot recover. Trimming them lets your lily send that energy toward fresh, healthy growth instead.
Start by looking closely at each leaf. If a leaf is mostly brown, remove the whole thing right at its base.
Cut as close to the soil or main stem as you can manage. A clean cut near the bottom looks neater and heals faster.
For small brown tips, you can simply trim away the damaged part. Follow the natural pointed shape of the leaf so it still looks tidy.
Leave a tiny sliver of brown at the edge if you want. Cutting into healthy green tissue can create a fresh wound that browns again.
Sharp tools matter more than most people think. Dull blades crush leaf tissue, which leaves ragged edges and invites trouble.
Wipe your scissors with rubbing alcohol before and after each trim. Doing so keeps germs from traveling between leaves or other houseplants.
Many New York plant owners do a quick trim every few weeks in the fall. It keeps the lily looking fresh while you work on the real cause.
Think of trimming as tidying the room, not fixing the leak. The next steps tackle why the browning happened in the first place.
2. Check The Soil Before Every Watering
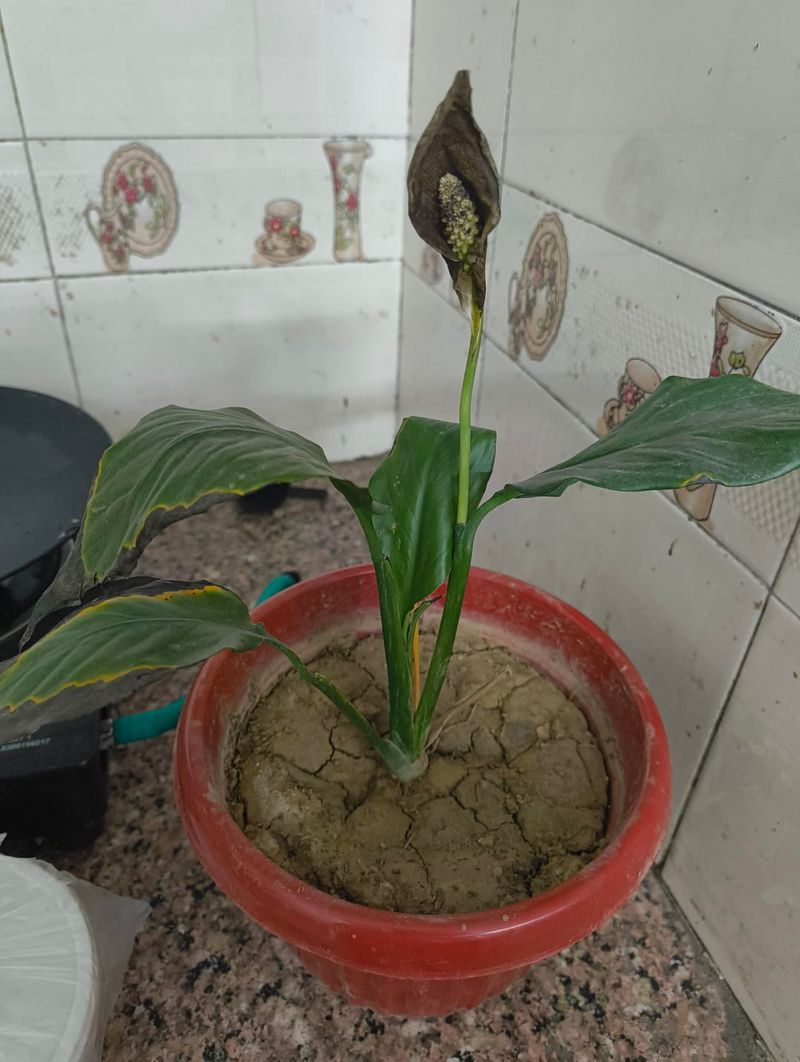
Here is a little secret from seasoned plant people: the calendar makes a poor watering guide. Your finger is far more reliable than any weekly schedule.
Peace lilies like soil that stays evenly moist but not soggy. Too much or too little water can both lead to brown leaves.
Push your finger about one to two inches into the soil. If it feels dry at that depth, go ahead and water.
Feeling a bit of cool dampness means you can wait another day or two. Checking again tomorrow takes only a few seconds.
Prefer gadgets over dirty fingers? A cheap soil moisture meter gives a quick reading and removes the guesswork.
Thirsty plants give clear clues. Leaves droop, tips get crispy, and the pot feels surprisingly light when you lift it.
Your New York Garden Changes Every Week. Your Plan Should Too.
Gardening in New York changes quickly throughout the season. Every Friday you’ll receive a simple weekly plan showing exactly what to plant, prune, fertilize, harvest, and protect so you never miss the right timing.
Overwatered plants act differently. Leaves turn yellow and brown, the plant wilts, and the pot stays heavy and wet.
Soggy soil can lead to root rot, which is much harder to fix. Healthy roots need air as much as they need water.
When it is time, water slowly until it drains from the bottom holes. Then empty the saucer so roots do not sit in a puddle.
Fall changes everything about watering needs. Shorter days and running heat can dry some pots faster and slow others down.
Plant size, pot size, and room humidity also play a role. Adjust as you go, and let the soil guide your hand.
3. Switch To Filtered Or Rainwater
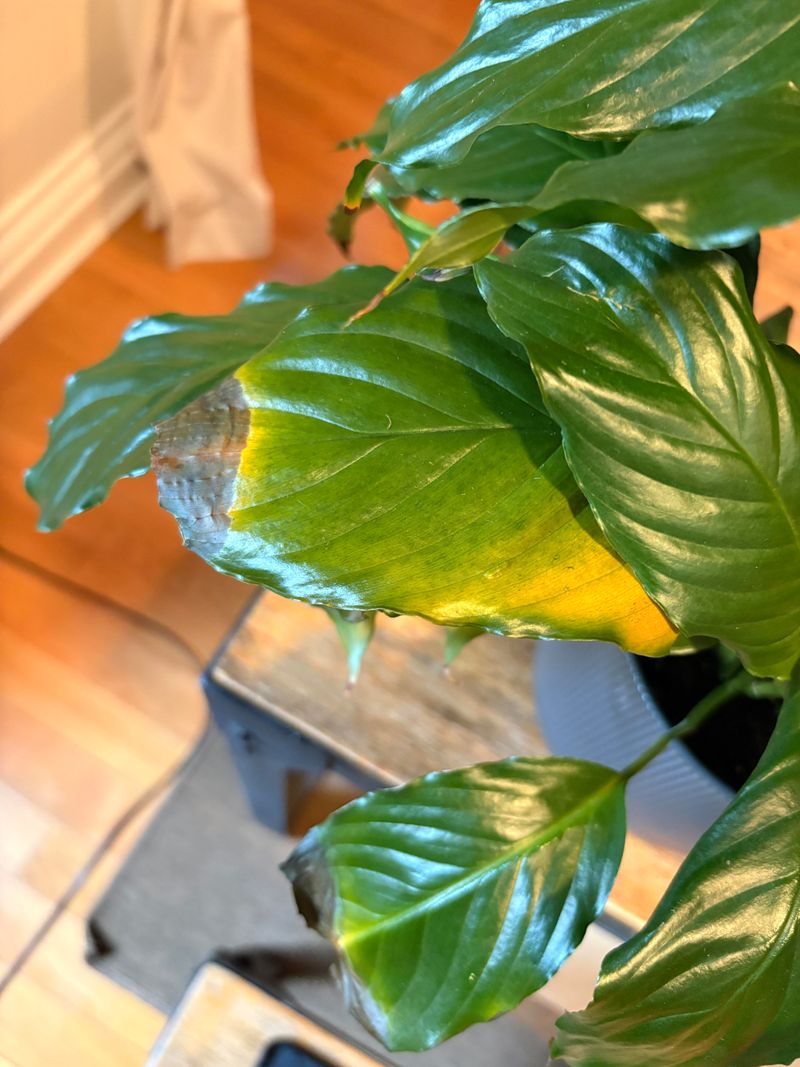
Believe it or not, your kitchen faucet might be the sneaky culprit. Peace lilies are picky about what comes out of the tap.
Most city water contains chlorine, chloramine, and sometimes fluoride. Over time, those chemicals build up in the soil and stress the plant.
Fluoride is especially troublesome for peace lilies. It travels through the plant and collects at the leaf tips, which brown first.
Chlorine and chloramine bother the fine, delicate roots. Stressed roots struggle to deliver water, and the leaves show it.
New York has famously good tap water for drinking. Even so, plants with sensitive leaves may react to the added treatment chemicals.
Filtered water is an easy upgrade for most homes. A basic pitcher filter removes many of the chemicals plants dislike.
Distilled water works well too, and it is cheap at most grocery stores. Some growers mix it with a little filtered water for balance.
Rainwater might be the best treat of all. Set a clean bucket on a balcony or fire escape during a fall shower.
You may have heard that letting tap water sit overnight helps. Leaving it out lets chlorine escape, but fluoride and chloramine stay put.
Remineralized filtered water is another smart choice. It strips out harsh stuff while keeping helpful minerals your lily can use.
Give the new water a few weeks to show results. Fresh leaves should come in cleaner, with green tips from end to end.
4. Move It Away From Heat Vents And Radiators
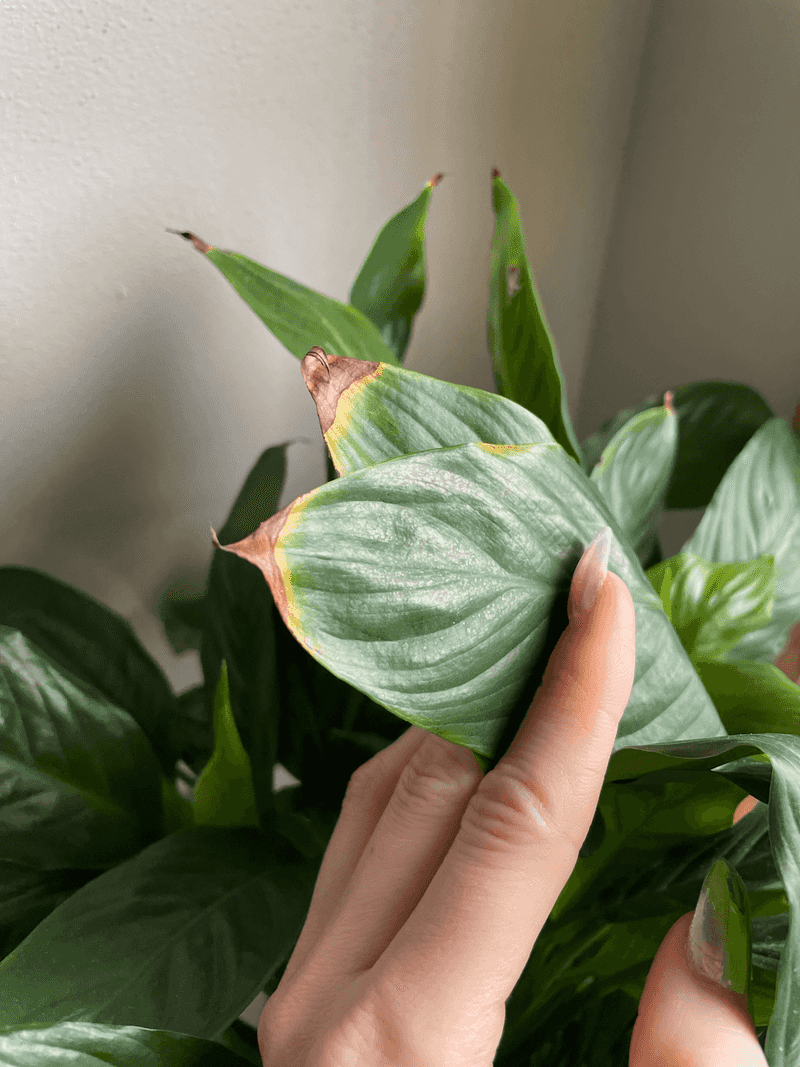
Clank, hiss, bang. Anyone who has lived through a New York fall knows the sound of the radiator waking up.
Steam heat feels wonderful on chilly nights, but your peace lily disagrees. Hot, dry air blasting nearby can scorch its tender leaves.
These plants grew up on rainforest floors, under warm and steamy canopies. They are happiest between 65 and 80 degrees Fahrenheit.
Radiators and heat vents push temperatures far past that comfort zone. Worse, they suck moisture from the air around them.
Look for crispy brown tips and edges that crackle when touched. Plants sitting near heat often show damage on the side facing the source.
Many older apartments have radiators tucked right under windows. Sadly, those same sunny sills tempt us to place plants in the danger zone.
Try moving your lily at least three to four feet from any heat source. A plant stand across the room can make a big difference.
Forced air vents deserve the same caution. Check which way the air flows, and keep leaves out of the direct stream.
A radiator cover with a shelf may look cute for plants. Unfortunately, it still radiates heat straight into the pot and roots.
Quick tip: hold your hand where the plant sits. If it feels noticeably warm or breezy, find a calmer corner.
Your lily will reward the move with softer, greener leaves. Fewer crispy edges mean you can relax and enjoy the cozy season.
5. Keep It Clear Of Cold, Drafty Windows
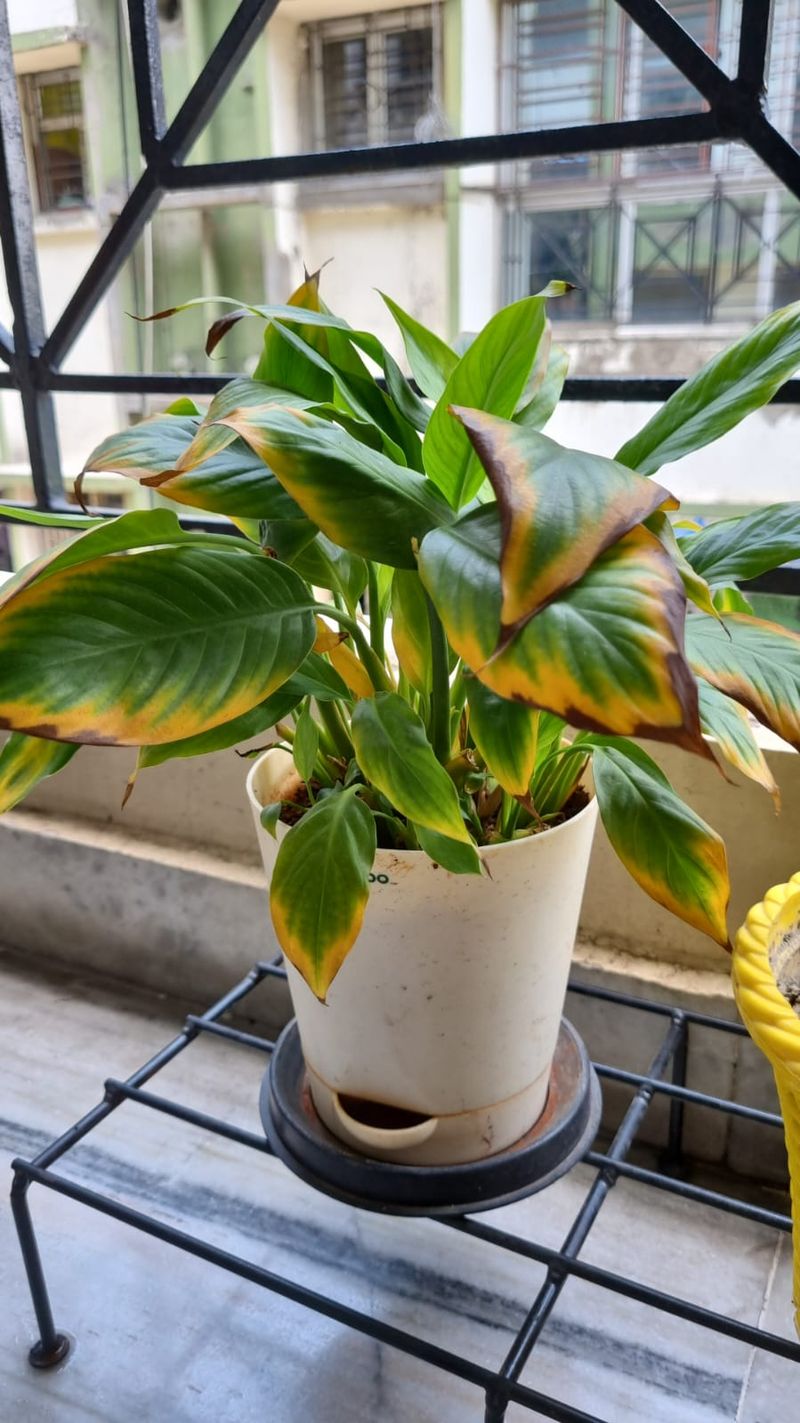
Picture wearing flip-flops in a November breeze. Your peace lily feels much the same way beside a leaky window.
These tropical plants dislike temperatures below about 59 degrees Fahrenheit. Cold drafts and sudden chills can stress them quickly.
Damage from cold looks a bit different than dry browning. You may spot large brown areas or soft, blackish patches on leaves.
Leaves touching cold glass often suffer first. Even a few frosty nights can leave marks that do not fade.
Old buildings are charming but often drafty. Single-pane windows and gaps around frames let icy air sneak inside.
Try the candle test to find drafts. Hold a lit candle near the window, and watch for the flame to flicker.
Once you find a drafty spot, move the plant a few feet back. Keeping leaves off the glass helps a lot.
Weather stripping or plastic window film can seal small leaks. Both options are cheap and help your heating bill too.
Be careful when airing out a stuffy apartment. A blast of cold air from an open window can shock the plant fast.
Front doors and hallway entries can also bring in cold gusts. Plants near busy doors may need a quieter home.
Aim for a steady, warm room without big swings. Consistent conditions help your lily stay calm and green all season.
6. Run A Humidifier Or Group It With Other Plants
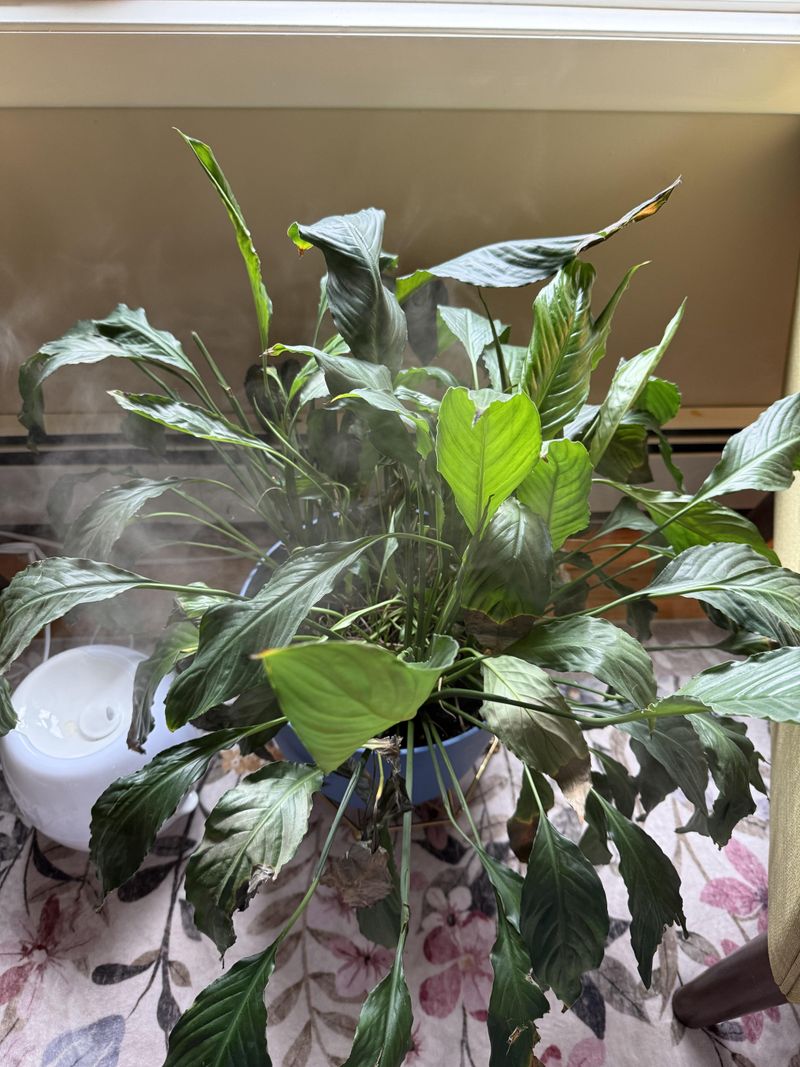
Ever notice your lips and hands getting dry once the heat kicks on? Your peace lily is feeling that same thirsty air.
Peace lilies thrive when humidity sits between 40 and 65 percent. Heated fall apartments can drop well below that range.
Dry air pulls moisture out of the leaves faster than roots can replace it. The result is dry, brown, papery tips.
A small humidifier is the most reliable fix. Place it a few feet away, and let it run during the day.
Cheap hygrometers show your room humidity at a glance. Many cost under ten dollars and take the guessing out of it.
Here is a fun fact: plants release water through tiny pores in their leaves. Scientists call the process transpiration.
Grouping plants together lets them share that moisture. A cluster creates a little humid pocket, like a mini jungle.
Pebble trays offer another simple boost. Fill a tray with pebbles and water, then set the pot on top.
Keep the pot bottom above the water line, though. Roots sitting in water can start to rot.
Misting gives a quick, short-lived lift. It helps a bit, but the effect fades within an hour or so.
Bathrooms with a window can make lovely spots too. Shower steam keeps the air moist, which peace lilies adore.
Try one or two of these ideas together. Your lily will thank you with smooth, glossy leaves.
7. Flush The Soil To Rinse Out Fertilizer Salts
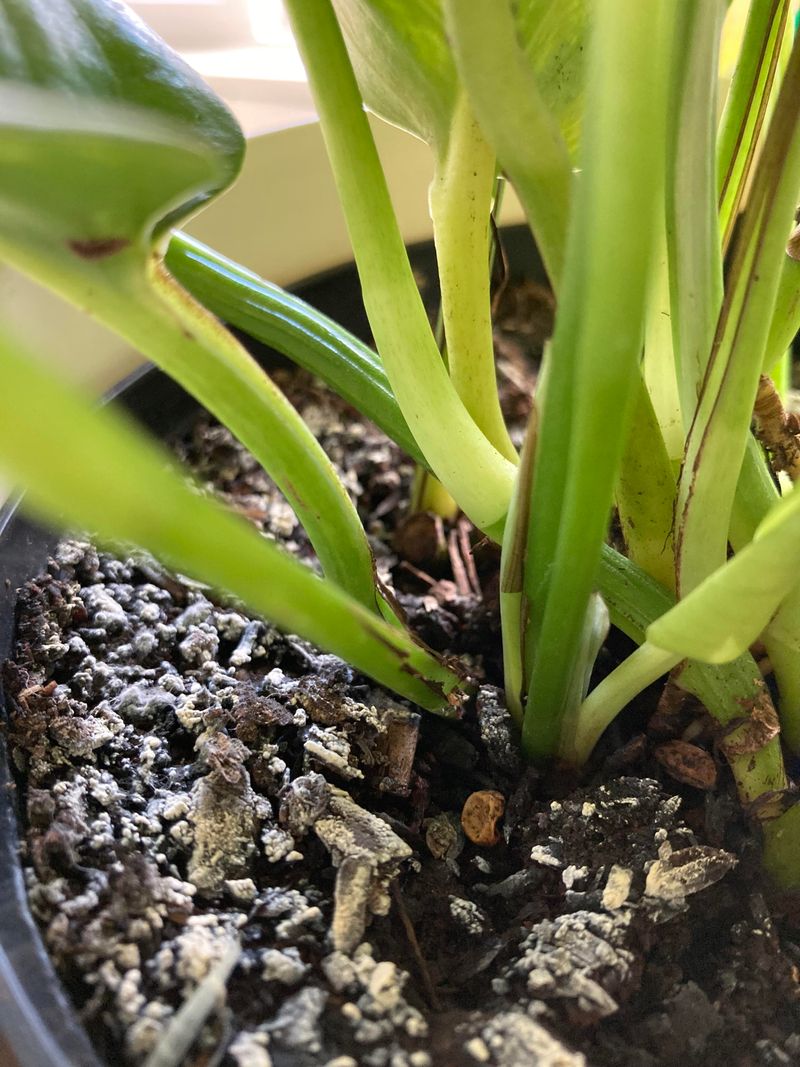
Take a peek at the rim of your pot. Do you see a white, crusty ring along the edge or soil?
That crust is likely salt buildup from fertilizer and tap water. Over time, those salts can burn tender roots.
Burned roots cannot move water well to the leaves. Tips and edges then turn yellow, then brown.
Symptoms often show up soon after feeding the plant. If browning follows fertilizer, salts are a strong suspect.
Thankfully, the fix is basically a spa day for your pot. Flushing rinses the soil clean with fresh water.
Carry the plant to a sink or bathtub first. Make sure the pot has working drainage holes.
Slowly pour two to three times the pot’s volume through the soil. For a one-gallon pot, use two or three gallons.
Filtered or distilled water works best for this job. It carries salts away without adding new ones.
Let every drop drain out before returning the plant to its saucer. Soggy soil after flushing can cause new trouble.
Scrape off any hard crust from the top layer too. A fresh sprinkle of potting mix can replace it.
Plan to flush every two to three months. Regular rinsing helps, even if you only use tap water.
Many plant lovers pair flushing with fall cleanup. It resets the soil before the slow winter months arrive.
8. Pull It Back From Harsh Direct Sun
Sunshine feels like a gift in the fall, but too much can backfire. Peace lilies prefer shade over a full sunbath.
In the wild, they grow beneath tall rainforest trees. Light reaches them softly, filtered through layers of leaves above.
Bright, indirect light suits them best indoors. They even handle lower light better than many houseplants.
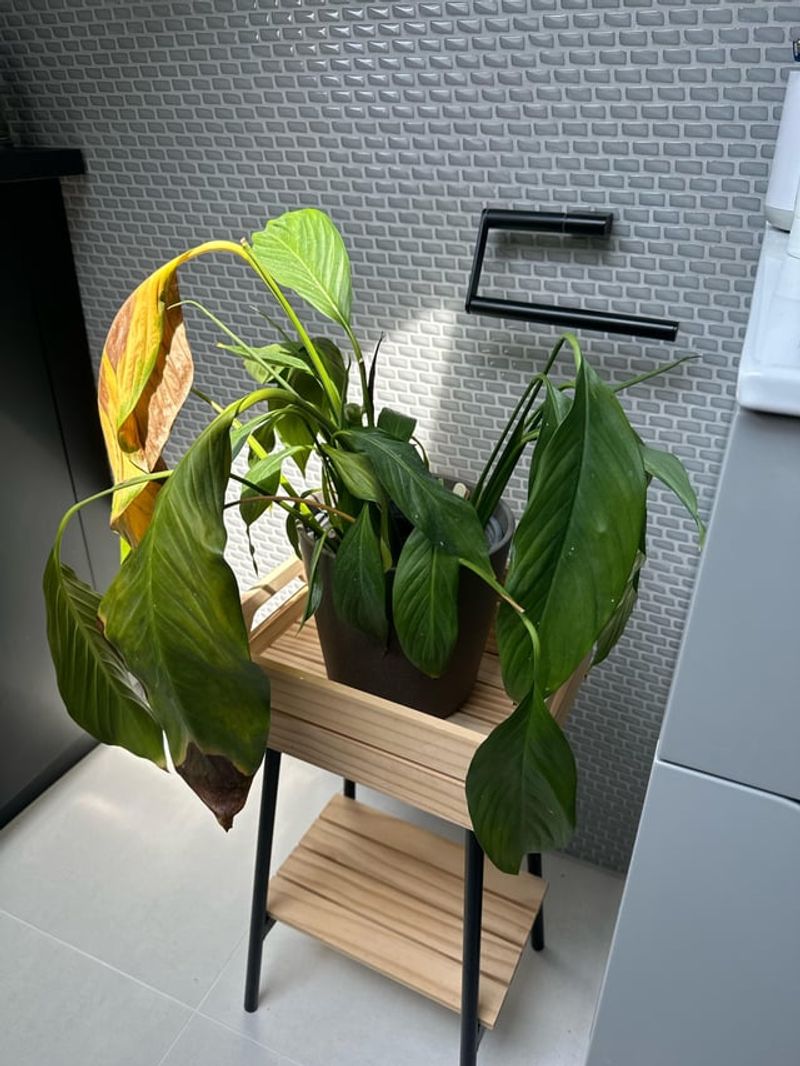
Direct sun, especially strong afternoon rays, can scorch delicate leaves. Burned spots turn brown, faded, or bleached yellow.
Flowers may look washed out as well. Sometimes the whole plant droops to shield itself from harsh light.
A New York apartment might seem too dim for sunburn. Yet an unprotected south or west window can still be intense.
Fall sun also sits lower in the sky. It can slant deep into rooms and hit plants that were safe all summer.
Try pulling the pot a few feet back from the glass. A sheer curtain softens light nicely without making it dark.
East-facing windows are often a sweet spot. Morning sun is gentler and fades before the hottest part of the day.
Watch the shadow your hand casts over the plant. A soft, fuzzy shadow means the light is about right.
Scorched leaves will not heal, so trim the worst ones. New growth should come in clean once the spot improves.
9. Repot If Roots Are Circling The Pot
Sometimes a peace lily simply outgrows its home, like a kid bursting out of last year’s sneakers. Crowded roots cause real stress.
Most peace lilies need a bigger pot every one to two years. Growth slows and leaves suffer when space runs out.
Check for roots poking out of the drainage holes. That is a classic sign the plant feels cramped.
Watering clues help too. Water might rush straight through, or the plant wilts soon after a good drink.
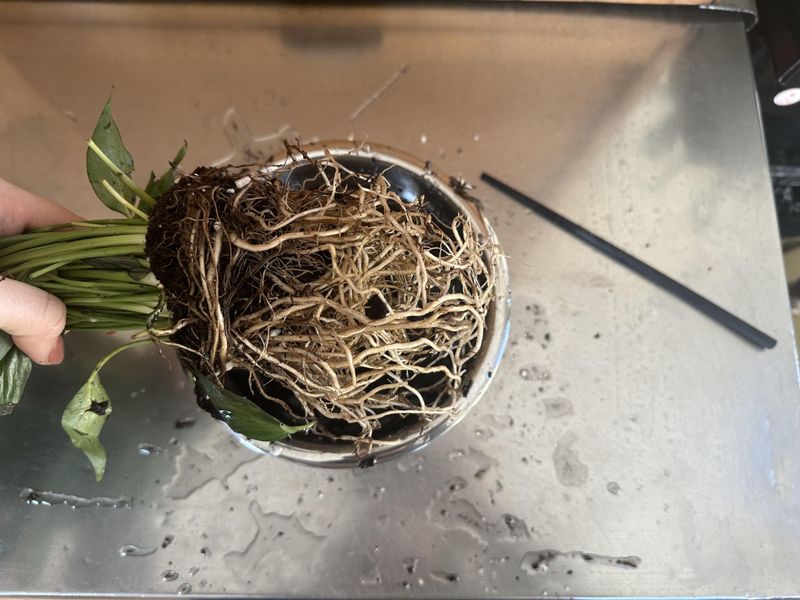
For a closer look, gently slide the plant out of its pot. Roots wound tightly in circles mean it is root-bound.
Squished roots struggle to absorb water and nutrients. Leaves then brown and droop, even with perfect care.
Spring is the ideal time for repotting. If roots are badly packed this fall, though, you can repot now.
Pick a pot only one to two inches wider than the old one. Extra soil stays wet too long and can cause rot.
Choose a well-draining mix with peat, perlite, or bark. That blend holds moisture while still letting roots breathe.
Loosen circling roots gently with your fingers before planting. Trim any mushy or dark roots with clean scissors.
Water well after repotting and keep it out of bright sun. Expect a short sulk before your lily perks up again.
10. Hold Off On Fertilizer Until Spring
Good news for busy plant parents: this last fix means doing less. Put the fertilizer bottle on a high shelf until spring.
Peace lilies grow actively in spring and summer. As fall arrives, shorter days slow that growth way down.
A slower plant uses far fewer nutrients. Extra fertilizer just sits in the soil and piles up as salt.
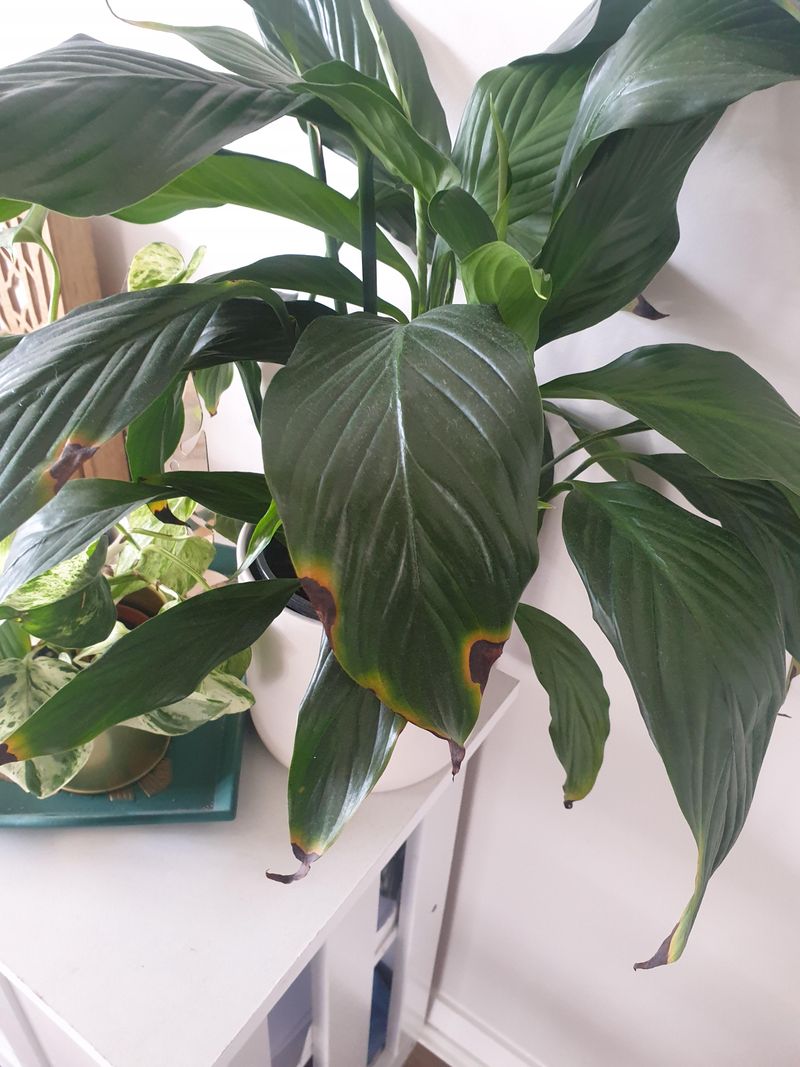
Those salts gather along leaf edges and tips. The tissue there browns, a problem growers call fertilizer burn.
Plenty of well-meaning owners feed more when leaves look sad. Sadly, that often makes the browning worse.
Suspect you overdid it already? Flush the soil with clean water to wash the extra salts away.
When spring returns, go easy with feeding. A balanced, water-soluble fertilizer at half strength works well.
Feed about once a month during the growing months. Watch the new leaves, and cut back if tips start browning.
Fall and winter make a natural rest period. Your plant is recharging, not starving, during these months.
Here is a helpful trick for remembering. Mark your calendar for March, when longer days signal it is time to feed.
Pair this rest with the other fixes, and results follow. By spring, expect lush leaves and maybe a few white blooms.