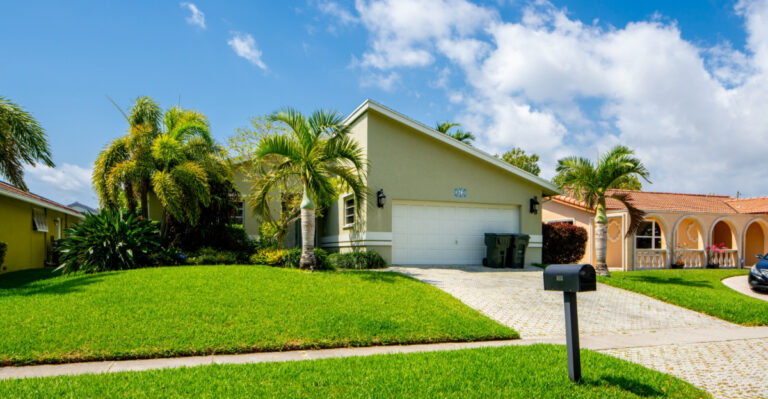
How To Level A Bumpy Florida Lawn Without The Use Of Heavy Equipment
A bumpy lawn is one of those problems that sneaks up on Florida homeowners.
It starts as a subtle unevenness that’s easy to ignore, then one day you’re mowing and the blade scalps a high spot, or you notice water sitting in the same low patch after every afternoon storm, or a guest rolls an ankle crossing the yard.
What felt like a minor cosmetic issue turns out to have been quietly causing real problems the whole time.
The assumption most people jump to is that fixing it properly means heavy equipment, professional crews, and a project budget that puts the whole thing in the too-hard basket for another season.
Florida lawns have a reputation for being complicated, and leveling one sounds like exactly the kind of job that requires more than a weekend and a wheelbarrow. That reputation oversells the difficulty for most bumpy lawns.
The uneven ground that develops naturally in Florida yards, from sandy soil that shifts and settles, root activity, and the constant cycle of heavy rain followed by dry spells, responds well to a hands-on approach that skips the heavy machinery entirely.
The process takes patience across a season rather than muscle across a weekend.
The results, done right, are just as solid.
1. Find The Real Reason Your Florida Lawn Feels Bumpy

Grab a cup of coffee, walk your yard slowly, and pay close attention to where the ground rises and falls. Bumps and dips in a lawn rarely appear without a reason, and adding soil on top without understanding the cause is a short-term fix that often fails within a season.
Sandy soils common throughout Central and South Florida can wash out or settle unevenly after heavy rainy-season storms.
Uneven sod seams from a poor installation, foot traffic patterns, vehicle ruts near the driveway edge, and low spots near patios or sidewalks are all common culprits.
In many Florida neighborhoods, armadillo digging and mole cricket tunneling create irregular humps and soft depressions that feel spongy underfoot.
Tree roots from live oaks, palms, or large shade trees can push soil upward over time, creating firm ridges that topdressing will not flatten. Irrigation leaks can erode soil beneath the surface and leave hollow-feeling low spots.
Poor original grading near the foundation or a drainage swale that has shifted can also cause water to pool and soil to settle unevenly.
Serious drainage failures, sinkhole concerns, or movement near hardscape structures are not DIY topdressing projects. Those situations need a professional evaluation before any soil work begins.
For everything else, diagnosing the cause first puts you ahead of the problem instead of just covering it up.
2. Mow To The Proper Height Before Checking Uneven Spots

Before adding any material to your lawn, mowing helps you see the terrain much more clearly. Tall grass hides dips, ridges, and sod edges that are easy to miss when blades are overgrown.
Mowing down to a reasonable height for your turfgrass type gives you a much cleaner view of what actually needs to be fixed.
Your Florida Garden Changes Every Week. Your Plan Should Too.
Gardening in Florida changes quickly throughout the season. Every Friday you’ll receive a simple weekly plan showing exactly what to plant, prune, fertilize, harvest, and protect so you never miss the right timing.
Homeowners grow several different turfgrass types, and mowing height is not one-size-fits-all. St. Augustinegrass, the most common lawn grass across much of the state, generally tolerates a moderate mowing height and should not be scalped.
Bahiagrass, common in North and Central Florida pasture-style lawns, handles a slightly lower cut but still needs leaf area to stay healthy.
Zoysiagrass, bermudagrass, and centipedegrass each have their own preferred ranges that UF/IFAS Extension and your local county Extension office can confirm.
Avoid cutting any stressed grass too short during extreme summer heat or spring drought, especially in inland areas of Central Florida where soils dry quickly. A stressed lawn that gets scalped before leveling is harder to recover and more vulnerable to weeds moving in.
After mowing, rake or blow away loose clippings, leaves, and debris. Topdressing material needs to reach the soil surface and settle around the grass blades, not sit on top of a layer of clippings that will break down and shift the surface again.
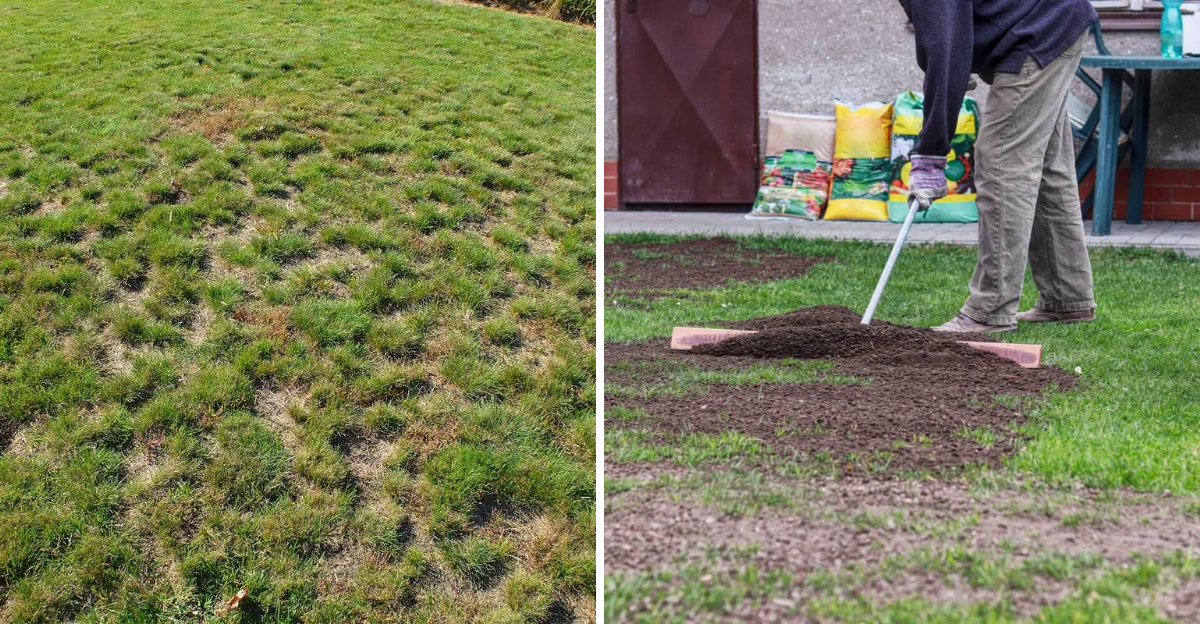
3. Mark Low Areas Before You Add Any Soil Mix

Scattered topdressing across an entire yard without a plan wastes material and rarely produces even results.
Walking your lawn methodically and marking specific low spots before you open a single bag of mix is a smarter, more targeted approach that saves time and effort.
Use small flags, wooden stakes, or even spray paint to mark the edges of each dip or depression. A long straight board, a piece of lumber, or a string line stretched across the area can help you see just how deep a low spot actually is.
Shallow dips that are just a half inch or so below the surrounding surface are good candidates for gradual topdressing. Deeper depressions, especially those near a patio edge, a foundation, a drain, or an irrigation line, may need more investigation before you fill them.
Low spots near downspouts or along the back fence in South Florida neighborhoods often stay wet after rain and may reflect a drainage problem rather than simple soil settling.
Filling those areas without addressing the water flow can create a soggy, compacted zone where grass struggles to recover.
In North Florida, uneven areas under large shade trees may be caused by root activity or thinning turf from low light rather than soil movement.
Marking your problem areas first gives you a realistic picture of what is a simple fix and what may need a closer look before any soil touches the ground.
4. Use A Thin Topdressing Layer Instead Of Burying Grass

Patience is the most underrated tool in lawn leveling. Homeowners sometimes try to fix a deep dip in one afternoon by dumping a thick layer of material over the area, and the grass underneath suffers for it.
Grass blades need sunlight, air, and space to photosynthesize, and burying them under a heavy cover cuts off all three at once. UF/IFAS guidance for St. Augustinegrass references light topdressing, around a quarter inch at a time, using soil similar to what is already beneath the turf.
For deeper low spots, build the area gradually or use plugs or sod rather than burying existing grass.
The safer approach is to apply a thin layer at a time and allow the grass to grow through before adding more if the area still needs building up. Grass that can push through a light application will gradually fill in the low spot as the material settles and the turf thickens.
This gradual method works especially well for St. Augustinegrass, which has wide blades that can be easily smothered under too much material.
Deeper depressions that cannot be filled gradually may need small plugs or pieces of sod placed in the low area after partial filling, giving the grass a better chance to establish from the surface rather than pushing through from below.
This is particularly useful in shaded spots under oaks or fences where grass is already thin.
Avoid the temptation to do the whole yard in one long weekend. Working in sections and checking the results after a few weeks of growth gives you better control and protects the lawn from unnecessary stress during intense summer heat.
5. Choose A Mix That Matches Your Turf And Soil

Not every bag of material sold at a garden center is the right choice for your lawn. The best topdressing mix depends on your existing soil type, the turfgrass you are growing, your drainage situation, and what caused the unevenness in the first place.
Using the wrong material can create a layered soil profile that actually slows drainage and causes more problems than it solves.
Our soils are often sandy, especially in Central Florida and coastal areas, and pure sand topdressing can work well when it closely matches the existing soil.
However, sand that is too fine or too coarse compared to the native soil can create a barrier layer that disrupts water movement.
UF/IFAS and county Extension offices recommend matching topdressing material to existing soil conditions rather than defaulting to whatever is cheapest or most available.
Mature, weed-free compost can improve organic matter in depleted sandy soils, but it should be used carefully so it does not smother turf or introduce weed seeds.
Avoid random fill dirt, heavy clay, construction debris, or unknown bulk soil from unverified sources.
These materials can bring in pests, weed seeds, soil-borne pathogens, or drainage problems that create a bigger headache down the road.
Centipedegrass lawns are especially sensitive to soil pH and fertility changes, so any amendment near a centipede lawn should be reviewed with local Extension guidance before application.
Getting the mix right the first time protects both the lawn and your effort.
6. Work The Material Into The Lawn With A Rake Or Broom

Heavy equipment is not needed to spread topdressing effectively across a lawn.
A landscape rake, a leveling rake, a push broom, the backside of a standard garden rake, a flat shovel, and a wheelbarrow are all the tools most homeowners need to get the job done in sections over a weekend.
Start by shoveling small amounts of material into the low spot rather than dumping a large pile all at once. Use the rake or the flat back of a garden rake to pull the material outward in a thin, even layer.
The goal is to work the topdressing down around the grass blades and into the low area, not leave a mound sitting on top of the turf. Grass tips should remain visible through the material after spreading.
Feather the edges of the topdressed area so there is no abrupt ridge between the filled spot and the surrounding lawn.
Step back and look at the surface from different angles, including from a low crouch, to check for high or low spots you may have missed from standing height.
Florida afternoon light at a low angle can be especially helpful for spotting surface irregularities.
Work in manageable sections rather than trying to cover the entire yard in one session. Large lawns in South Florida or sprawling Central Florida properties are easier to tackle accurately when broken into zones, allowing you to check each area before moving on.
7. Water Lightly And Let The Grass Grow Through

After spreading topdressing, light watering helps settle the material down around the grass blades and into the low spots. Think of it as helping the mix find its final resting place rather than saturating the area.
Flooding the spot can wash material off to the sides, undo your work, and compact sandy soil in a way that makes recovery harder.
Florida irrigation rules and local watering restrictions still apply even when you are trying to help a freshly leveled area settle. Watering schedules vary by county and water management district, so check your local rules before running extra irrigation cycles.
Many areas of the state limit watering to two days per week outside of new installation windows, and topdressing alone does not usually qualify for an exception.
Sandy soils in Central Florida and along coastal areas dry out quickly, especially during the spring dry season in April and May before the summer rains arrive.
Keep a close eye on soil moisture under the topdressed area during that period, since dry material can shift or blow in wind before the grass grows through it.
Limit foot traffic across freshly leveled areas while the grass recovers and pushes through the topdressing.
Bermudagrass and zoysiagrass tend to recover relatively quickly in full sun, while St. Augustinegrass and centipedegrass may take a bit longer, especially if the area had any existing stress before leveling.
8. Fix Drainage Thatch Or Pest Problems Before Leveling Again

Leveling a bumpy lawn is not always a one-and-done project. If low spots or bumps return within a season or two, the lawn is telling you something more is going on underneath the surface.
Covering the same area again without investigating the cause is a cycle that costs time, money, and grass health.
After your first leveling pass, walk the yard after a heavy rain and watch where water pools or drains slowly. Persistent wet areas may indicate a drainage problem that topdressing cannot solve on its own.
Check sprinkler heads for coverage gaps, leaks, or heads that are tilted and washing soil away from one spot repeatedly. Irrigation issues are a surprisingly common cause of recurring low spots in lawns, especially in neighborhoods with aging systems.
Thatch buildup in zoysiagrass or bermudagrass can create a spongy, uneven feel that looks like a soil leveling problem but is actually a layer of organic debris between the grass and the soil.
Dethatching or core aeration, done at the right time for the turfgrass type, addresses that issue more effectively than topdressing alone.
Pest activity from mole crickets, which are common across North and Central Florida, or continued armadillo disturbance will keep creating new bumps regardless of how much you level.
Your local county Extension office can help identify pest damage and recommend appropriate management steps so your leveling work actually holds up over time.