Simple Ways Indiana Gardeners Can Improve Hydrangea Blooming
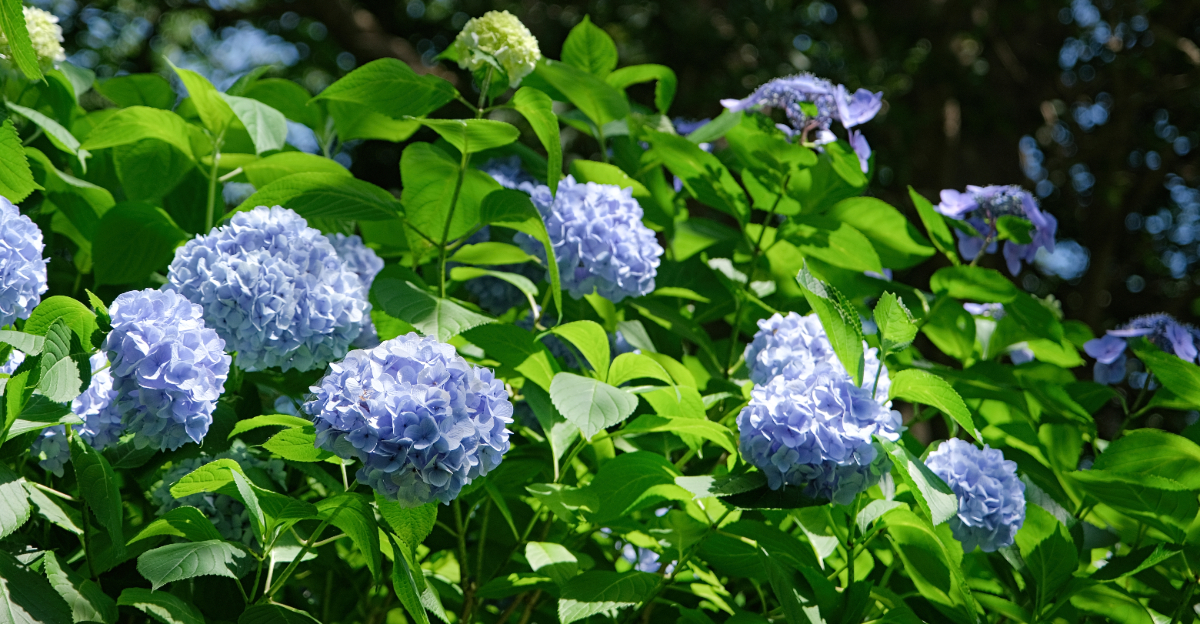
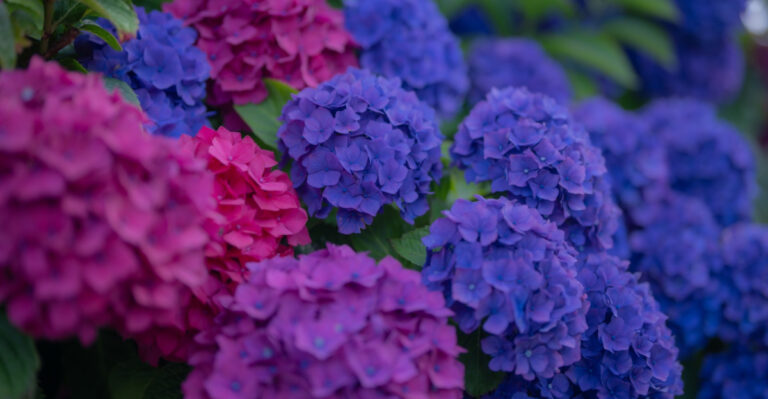
Hydrangeas have a way of stopping people mid-walk. One healthy bush, loaded with color, can make an entire yard feel finished. But plenty of Indiana gardeners end up with the opposite: a wall of green leaves and not a single bloom in sight.
Indiana weather can throw hydrangeas off track. Late frosts wipe out tender buds, and heavy clay soil holds onto water longer than these plants like.
The fix usually comes down to timing and a handful of small habits. Pruning at the right moment matters more than most people realize, and so does the fertilizer ratio sitting in your shed. None of this requires fancy tools or a steep learning curve.
Here are eight practical adjustments that hold up well in Midwest conditions. By the end, you will know exactly where your hydrangea care plan needs a tweak.
1. Prune At The Right Time

Grab your pruning shears, because timing is everything here. Pruning hydrangeas at the wrong moment is one of the most common reasons Indiana gardeners end up with bare shrubs come summer.
Most hydrangeas bloom on old wood, meaning the flower buds formed last fall. If you cut those stems back in early spring, you are literally snipping off next season’s blooms before they get a chance.
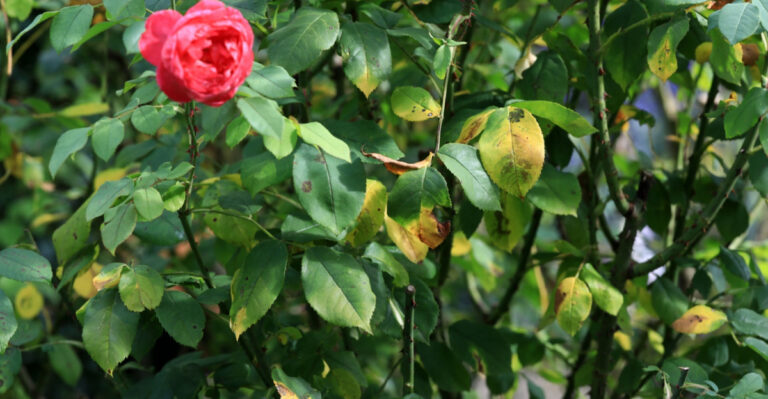
Bigleaf and oakleaf varieties are especially sensitive to this mistake. Those classic mophead types your grandmother grew almost certainly bloom on old wood.
The safest window for pruning old-wood bloomers is right after they finish flowering in midsummer. That gives the plant enough time to set new buds before cold weather arrives.
Smooth hydrangeas and panicle types are different because they bloom on new wood. You can trim those back in late winter without losing a single flower.
Not sure which type you have? Watch where the blooms appear and how the plant behaves after a hard winter. Old-wood bloomers often look bare and lifeless in spring, then push green from last year’s stems.
Learning your specific variety is the single most powerful move you can make. Once you match your pruning schedule to your plant’s biology, consistent blooming becomes almost automatic.
If you inherited a hydrangea and have no idea what it is, check the leaf shape first. Bigleaf varieties have broad, rounded leaves, while oakleaf types have deeply lobed foliage like an oak leaf.
Panicle hydrangeas have narrower, pointed leaves and cone-shaped blooms instead of a rounded mophead. This quick check can save you a season of guesswork before pruning time.
2. Skip The Heavy Fall Pruning

Fall cleanup feels satisfying, but your hydrangeas are quietly dreading your enthusiasm. Cutting them back hard before winter is one of the most common bloom-reducing mistakes in the region.
Those dried flower heads you see in October are not just decoration. They protect the tender buds sitting just below them from wind, cold snaps, and temperature swings.
Indiana winters can swing wildly, going from mild to brutal within a single week. Removing that natural insulation layer leaves buds exposed to conditions that can easily damage them.
Leave the old blooms on the plant through the cold months. They act like a tiny shield, buffering the buds from the worst of winter’s mood swings.
A thick layer of mulch around the base adds another layer of protection where it matters most. Pile it three to four inches deep, keeping it a few inches away from the main stems to avoid trapping moisture against the bark.
If you absolutely cannot resist tidying up, limit yourself to removing only damaged or broken branches. Anything with visible buds or healthy bark should stay put until spring.
Come March or early April, you can do a light cleanup pass. Focus on removing any stems that clearly did not survive the freeze, which will snap cleanly when bent.
Healthy stems flex rather than break, so use that test before cutting anything. Keeping your hands off the shears in fall could be the easiest change you make this year, and the one with the biggest payoff next summer.
3. Feed With The Right Fertilizer Ratio

Not all fertilizers are created equal, and your hydrangeas have strong opinions on the subject. Grabbing whatever is on sale at the hardware store can actually set your blooms back by weeks.
High-nitrogen fertilizers push plants to produce lush, dark green foliage, which sounds appealing until you realize that energy comes straight from the bloom budget. Leaves win, flowers lose.
What you want is a balanced formula or one that leans toward phosphorus. Phosphorus is the nutrient most directly linked to flower production in flowering shrubs.
Look for a fertilizer where the middle number in the N-P-K ratio is higher than the first number. Something like 5-10-5 or 10-20-10 hits the sweet spot for hydrangeas.
Slow-release granular formulas are especially useful because they feed steadily over weeks rather than dumping everything at once. That steady supply keeps growth even and blooming consistent.
Avoid fertilizers marketed for lawns or leafy vegetables, since those are almost always nitrogen-heavy. Your hydrangea does not want to become a hedge; it wants to flower.
Reading the label before you buy takes about sixty seconds. That small habit can be the difference between a plant covered in blooms and one that just sits there looking healthy but frustratingly flowerless all season long.
4. Fertilize On A Spring And Midsummer Schedule

Timing your fertilizer applications is just as important as picking the right product. Feed too early and the nutrients wash away before roots can absorb them properly.
The first application should go down in early spring, right as you start seeing new growth emerge from the stems. That signals the plant is actively waking up and ready to eat.
A second round in midsummer, around late June or early July, gives the plant a boost right when it needs energy most for developing next season’s buds. That second feeding is often skipped, which is a shame.
Do not fertilize after August in the Midwest. Late feeding pushes tender new growth that has no time to harden before frost arrives.
Soft, immature stems are extremely vulnerable to cold damage, and that damage often wipes out the bud tissue you worked all season to protect. Stop feeding early and let the plant slow down naturally.
Water your plants well before and after applying granular fertilizer. Dry soil causes fertilizer salts to concentrate near roots, which can cause leaf burn and stress.
Sticking to just two well-timed feedings per season gives hydrangeas what they typically need without overloading them. Consistency tends to beat intensity when it comes to improving hydrangea blooming across your yard.
5. Protect Buds From Late Frost

A single late frost in April can erase an entire season of blooms in one cold night. Indiana springs are unpredictable, and hydrangea buds are quite delicate when temperatures drop.
Old-wood bloomers are most at risk because their buds are already formed and exposed by the time spring warmth arrives. One night below freezing can blacken those buds completely.
Watch your local forecast closely from mid-March through early May. If temperatures are predicted to drop below 32 degrees, your hydrangeas need protection before sunset.
Frost cloth or burlap draped loosely over the shrub traps enough warmth to keep buds alive through a light freeze. Even an old bedsheet works in a pinch.
Do not use plastic sheeting directly on the plant because it transfers cold rather than blocking it. Fabric breathes and insulates; plastic concentrates the chill right where you do not want it.
Remove the covering as soon as temperatures rise the next morning. Leaving fabric on during a warm sunny day can trap heat and stress the plant in the opposite direction.
A simple habit of checking the forecast can save an entire summer’s worth of color. Protecting buds on just a few critical nights is one of the highest-impact moves you can make for stronger blooms.
6. Give Plants The Right Light Balance

Sunlight is a dial, not a switch, and hydrangeas need it set to a very specific level. Too much afternoon sun scorches leaves and exhausts the plant before blooms can fully develop.
The sweet spot for most varieties is morning sun paired with afternoon shade. That combination gives the plant the energy it craves without the heat stress that shuts down flower production.
In Indiana, west-facing beds are often problematic because they catch the hottest, harshest light of the day. Plants in those spots tend to wilt by mid-afternoon and struggle to recover overnight.
East-facing beds or spots sheltered by a large tree or structure on the west side tend to produce the most reliable bloom cycles. The morning rays energize without burning.
Panicle hydrangeas are the exception and can tolerate more direct sun than other types. If your yard is mostly open, that variety might be your best bet for consistent color.
If your current plant is struggling in a sunny spot, transplanting in early fall gives it time to settle before the next growing season. Moving a stressed plant sounds drastic but often yields dramatic results.
Matching the right plant to the right light condition removes a major barrier to blooming. Shade at the right moment is not a compromise; it is what these shrubs prefer.
7. Keep Soil Consistently Moist, Not Soggy

Hydrangeas are thirsty plants, but they are not fans of sitting in puddles. Getting the moisture balance right is one of those things that sounds simple but takes a little attention to master.
Soil that dries out completely between waterings stresses the plant and diverts energy away from flower production. Wilted leaves are a distress signal, not just an aesthetic problem.
Waterlogged soil cuts off oxygen to the roots, which leads to rot and a plant that struggles to absorb nutrients even with regular feeding. Both extremes hurt blooming.
The goal is soil that stays evenly moist about two inches down. Stick your finger into the soil near the root zone to check before watering rather than going by a fixed schedule.
Mulching around the base of the plant with two to three inches of wood chips or shredded bark dramatically slows moisture evaporation. That layer also moderates soil temperature, which roots deeply appreciate.
Clay-heavy soils common across much of the state can hold too much water after heavy rain. Amending with compost improves drainage while still retaining enough moisture for steady growth.
Drip irrigation or a soaker hose delivers water directly to the root zone without wetting the foliage, which reduces fungal issues. Healthy roots and consistent moisture create the foundation for reliable, beautiful hydrangea blooming season after season.
8. Pinch Growing Tips Mid-Season

Here is a trick many casual gardeners overlook, and it can change how full and floriferous your shrubs become. Pinching growing tips mid-season encourages the plant to branch out rather than just shoot upward.
When you remove the soft tip of a stem, the plant responds by pushing growth from the side buds just below the cut. More branches mean more potential bloom sites the following season.
This technique works best on smooth hydrangeas and panicle types that bloom on new wood. Pinching in late spring gives the resulting side shoots enough time to mature and set buds.
Use your fingers or clean scissors to remove just the top inch or two of each stem. You do not need to cut deep; a soft pinch on young growth is all it takes.
Avoid pinching after mid-July in the Midwest because new growth stimulated that late will not have time to harden before cold arrives. Early to mid-June is the ideal window for this technique.
Do not pinch every stem on the plant at once. Work in stages over a week or two to avoid shocking the shrub with sudden widespread growth disruption.
Gardeners who try it once often stick with it. A fuller, bushier plant covered in blooms is the reward, and it all starts with one small, confident pinch at the right moment during the growing season.