Heavy Equipment Is Not The Answer For A Bumpy Texas Lawn (Here Is What Works Instead)
A bumpy Texas lawn has a way of making itself known at the worst possible moments.
You invite people over for a backyard gathering and suddenly everyone is doing that awkward ankle-twist shuffle across the yard. The kids trip over invisible dips. The mower scalps one ridge and skips the next one entirely.
Many Texas homeowners look at an uneven lawn and immediately assume the solution involves renting equipment, hiring a crew, or spending several hundred dollars on something with hydraulics.
It almost never requires any of that.
The fix for a bumpy Texas lawn involves a few simple tools, the right timing, and a process that works with warm-season turf rather than against it.
The catch is that several common approaches make the problem worse before they make it better, and many homeowners never find out why.
Have you been trying to fix the same low spots in your Texas lawn for multiple seasons without lasting results?
These eight steps explain what actually works and in what order.
1. Mark Low Spots After Rain

Standing water after a rainstorm is the lawn communicating directly.
Those soggy patches and shallow puddles that linger long after rain stops are the clearest indication of where ground has settled, shifted, or sunken over time.
No tool reveals problem areas more accurately than a wet yard and a slow walk.
Head outside about thirty minutes after a good rain or a full irrigation cycle. Wear old shoes and pay attention to where your feet sink slightly or where water pools on the surface.
Small flags, garden stakes, or a can of marking spray all work for flagging every low spot found. A simple hand-drawn sketch of the yard with marked dips makes planning the actual work considerably more organized.
Texas soils, especially the heavy clay-based soils common across North and Central Texas, shrink and swell with moisture changes throughout the year.
That repeated movement creates uneven surfaces that worsen with each seasonal cycle. Bermudagrass and St. Augustine both hide shallow dips under their thick canopy, which makes problem areas easy to miss entirely during dry weather.
Checking after irrigation creates a controlled, repeatable way to spot new problem areas throughout the growing season.
Marking spots in spring and checking again in late summer after heat stress often reveals dips that were not visible earlier.
Keeping a simple record of where dips appear most often focuses all the leveling work precisely rather than spreading effort across the whole lawn based on guesswork.
The lawn has been trying to explain the problem the whole time. The rain just makes it easier to understand.
2. Rule Out Pests And Tunnels First

Before any topdressing mix gets opened, a slow walk across the lawn tells an important story about what is actually happening underfoot.
Some bumpy lawns are not caused by soil settling at all. Pest activity underground pushes up ridges, creates soft spots, and produces a lumpy surface that comes back regardless of how much is applied on top.
Your Texas Garden Changes Every Week. Your Plan Should Too.
Gardening in Texas changes quickly throughout the season. Every Friday you’ll receive a simple weekly plan showing exactly what to plant, prune, fertilize, harvest, and protect so you never miss the right timing.
Moles are one of the most common culprits in Texas lawns. They tunnel just below the surface searching for grubs and earthworms, leaving raised ridges and soft pathways that collapse when walked on.
Pocket gophers are particularly common in Central and West Texas, pushing up fan-shaped mounds of loose soil. Fire ant colonies create uneven mounding in warm months across much of the state.
Pressing down on any suspicious raised area with a foot reveals the difference quickly. A hollow, spongy area that collapses easily indicates tunnel activity underneath.
A firm but uneven spot is more likely soil settling or root activity from nearby trees and shrubs. Tree roots can lift turf and create persistent bumps that no amount of topdressing addresses permanently.
Topdressing over active pest tunnels buries the problem temporarily and produces the same bumps again within weeks.
Addressing the pest situation first, allowing the ground to settle, and then proceeding with leveling saves both time and material.
A lawn that keeps coming back bumpy in the same spots after multiple topdressing sessions is usually asking a different question than the one being answered.
3. Mow Low Before Topdressing

Many homeowners spread topdressing material across their lawn at normal mowing height and then wonder why the surface never actually smooths out.
The grass canopy is intercepting the material before it reaches the soil, and the leveling effort is sitting several inches above where it needs to be.
Cutting the lawn shorter than usual before topdressing is not optional preparation. It is the step that makes every subsequent step work correctly.
For Bermudagrass, mowing down to about half an inch to one inch before topdressing is appropriate. St. Augustine can be cut to around two inches.
The goal is reducing the grass canopy enough that topdressing material falls through the blades and makes contact with the actual soil surface below. Tall grass simply catches the material and holds it up in the canopy where it does nothing useful.
Bagging clippings during this mow matters as well. Leaving clippings on the lawn adds an organic layer that prevents good soil-to-topdressing contact. A clean, short surface is the foundation the leveling process requires.
Bermudagrass tolerates very low mowing well during active growth in summer. The temporary stress from cutting low resolves quickly when topdressing is applied correctly and irrigation follows promptly.
Timing this step during late spring or early summer, when soil temperatures are consistently above 65 degrees Fahrenheit, gives warm-season grasses the best recovery conditions after the low cut.
Mowing short feels counterintuitive before adding material to the lawn. The topdressing that actually reaches the soil makes the reasoning clear immediately.
4. Spread Thin Topdressing In Layers

The most common topdressing mistake in Texas lawns involves generosity applied in the wrong direction.
Spreading a thick layer of material in one pass seems efficient and looks promising for about a week before the grass underneath begins struggling.
A quarter to half an inch of topdressing material per application is the productive limit. Applied within that range, grass blades can push up through the new material, stay green, and continue growing while the leveling process proceeds.
Applied beyond that limit, the grass crown gets buried, sunlight gets blocked, and the result is a patchy lawn that takes far longer to recover than the original problem would have required.
For most Texas lawns, a blend of coarse sand and compost performs well as topdressing material. Matching the blend to the existing soil type matters considerably.
Adding pure sand to heavy clay soil without organic matter can worsen drainage over time rather than improving it.
A blend that improves drainage while retaining some moisture suits both Bermudagrass and St. Augustine well.
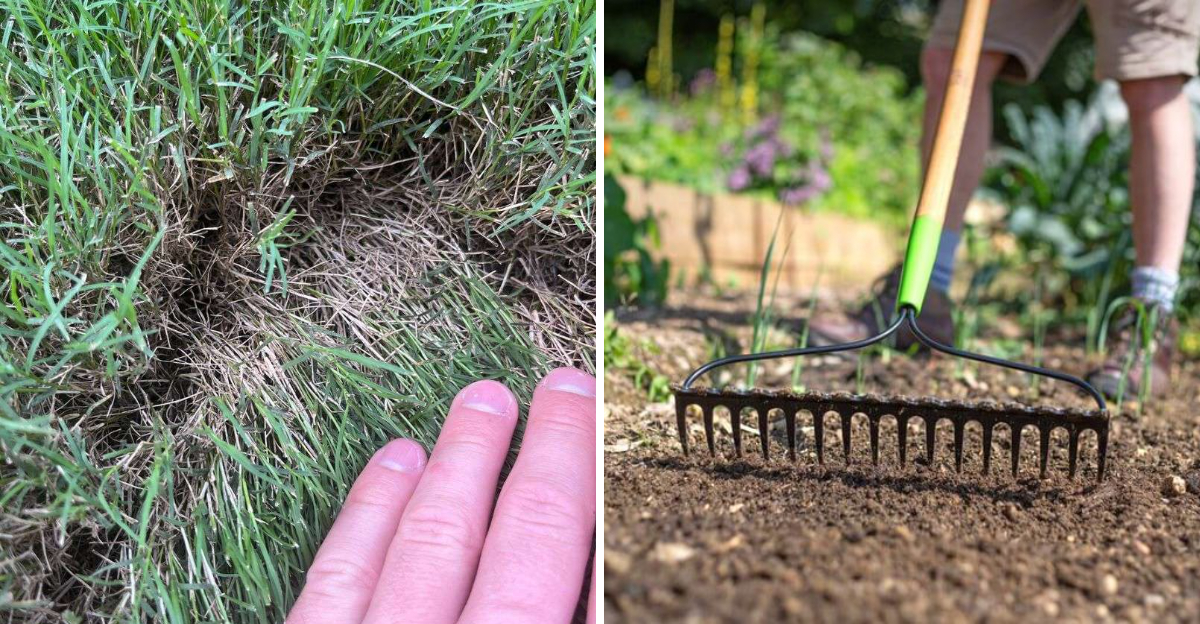
Spreading small shovel piles across the lawn and then working them out evenly with a metal landscape rake or a drag mat creates consistent distribution across the treated area.
Focus on building up low areas gradually rather than trying to correct everything in a single session.
Large low spots may need three or four thin applications spread across a full growing season to reach level with the surrounding turf.
Patience here is not just a virtue. It is the actual strategy.
5. Rake Soil Down To The Crown

Yes, spreading topdressing across the lawn looks like progress. But the material sitting on top of the grass blades is not progress.
The raking step is where the work actually occurs, and skipping the effort here undoes everything that came before.
A stiff metal landscape rake with flat tines works considerably better than a leaf rake for this task.
Working the topdressing material in multiple directions across the treated area pushes it down through the grass canopy until it reaches the soil surface and fills small gaps at ground level.
Short, firm strokes move material more effectively than long sweeping passes.
The grass crowns require specific attention throughout the raking process. Crowns are the growing points of each grass plant, located right at or just above the soil surface.
Burying crowns under topdressing material stresses or permanently damages turf. After raking, the green tips of grass blades should still be visible poking up through the topdressing.
If the grass disappears completely under the material, too much was applied.
Bermudagrass handles this process more forgivingly than St. Augustine because of its aggressive growth habit and lower crown position.
St. Augustine requires slower, more careful raking to avoid burying its stolons, which run along the soil surface rather than below it.
Taking extra time with the raking step avoids reseeding or re-sodding damaged sections later in the season. Raking slowly costs fifteen minutes. Recovering from buried St. Augustine stolons costs considerably more.
6. Fill Deep Dips In Stages

Some Texas lawn depressions are not minor surface irregularities.
They are genuine holes, sometimes two or three inches below the surrounding grade, caused by years of soil settling, old tree stump decay underneath, or collapsed animal burrows.
Attempting to correct a deep depression in one application creates a thick material layer that smothers the turf and produces a damaged patch where the problem used to be.
The staged approach corrects this situation without the setback. Apply a half-inch layer of topdressing, water it in lightly, and then allow the grass to grow up through the material over two to three weeks.
Once the grass has clearly grown through and the area looks green and healthy, apply another half-inch layer.
Repeating this process until the low spot is level with the surrounding lawn takes longer but produces lasting results without a recovery period.
Deep spots of two inches or more may require an entire growing season to correct properly using this method.
For very deep depressions specifically, carefully peeling back the turf with a flat spade, adding fill soil underneath, tamping it down firmly, and then replacing the turf on top works well for isolated spots deeper than three inches.
This approach works best during active growth periods for warm-season grasses, typically May through August across most Texas regions.
Filling with straight topsoil from a garden center without checking texture and composition creates a soil layer mismatch that disrupts water movement and root growth.
A sandy loam or a topdressing blend that matches the existing soil profile gives turf the best chance to root through each new layer successfully.
Two inches of depression took years to develop. One growing season to fix it is actually a reasonable trade.
7. Water Lightly After Leveling

The topdressing is raked in and the lawn looks noticeably smoother. Walking away at this point and leaving the rest to weather feels like the logical next step.
What happens in the first twenty-four hours after topdressing determines how well the work actually holds, and light watering is the step that completes the process.
Running sprinklers or moving a hose across the treated area for five to ten minutes gives the topdressing material enough moisture to begin settling into the soil below.
The goal is firm contact between the new material and the existing soil surface, not a heavy soaking that washes everything into uneven clumps or carries material away from the low spots just filled.
Light watering after topdressing accomplishes two things simultaneously. It helps the material bond with the existing soil surface, which speeds up the settling process and keeps the leveling work from shifting with the first heavy wind.
It also gives grass crowns a moisture boost immediately after the stress of being raked and partially covered with new material.
Warm-season grasses like Bermudagrass recover faster with consistent moisture during and after any turf management work.
For the first week after topdressing, light daily watering keeps the treated area consistently moist without creating the soft, soggy conditions that would undo the leveling.
Once grass visibly grows through the new layer and the material feels settled and firm underfoot, returning to the normal irrigation schedule is appropriate.
The lawn did the hard work. Five minutes of water is a reasonable closing gesture.