8 Rose Cleanup Steps To Reduce Black Spot In North Carolina Next Year
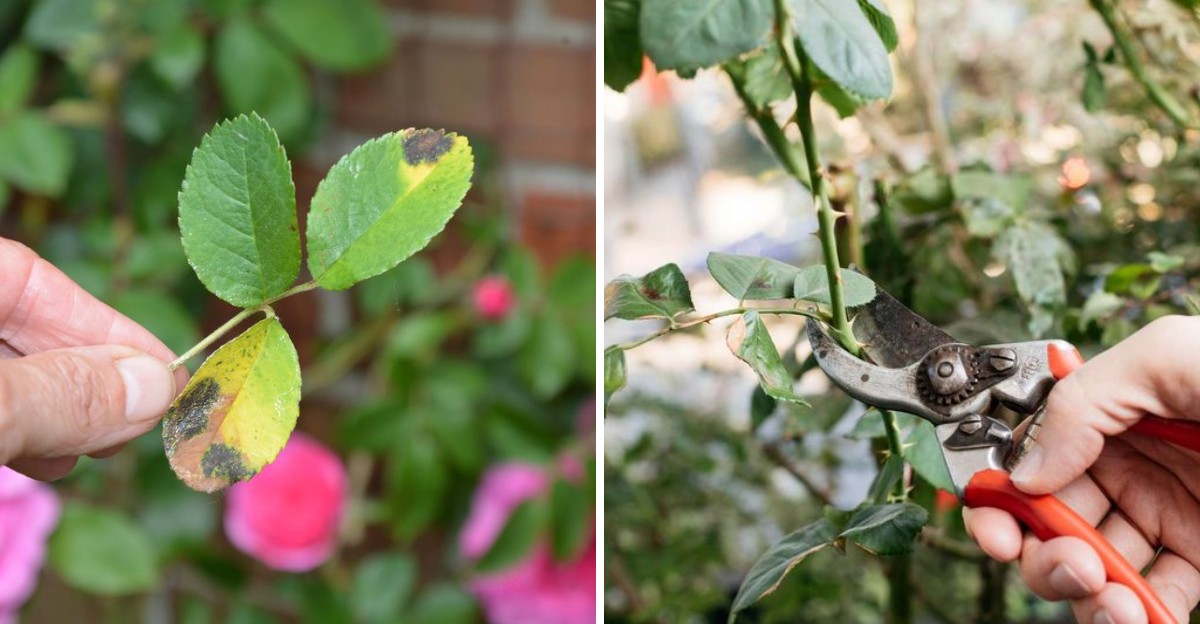
A fallen leaf can quietly shelter a fungus all winter, waiting for spring rain to splash it upward. That soggy pile under your shrubs is basically a little nursery for next year’s spotty, yellowing foliage troubles.
Researchers say the fungus needs leaves to stay wet for only about seven hours before infection begins. In humid North Carolina summers, that short window opens far more often than most of us would like.
I honestly find it fascinating that the best defense starts months before the first bud ever cracks open.
You can see why seasoned growers treat cold-weather cleanup as the real start of their gardening year.
A few simple chores now can mean greener leaves and far more blooms across North Carolina gardens later.
So which garden habits actually make the biggest difference, and which ones just waste your precious weekend time?
1. Rake Up Every Spotted Rose Leaf Under The Bush
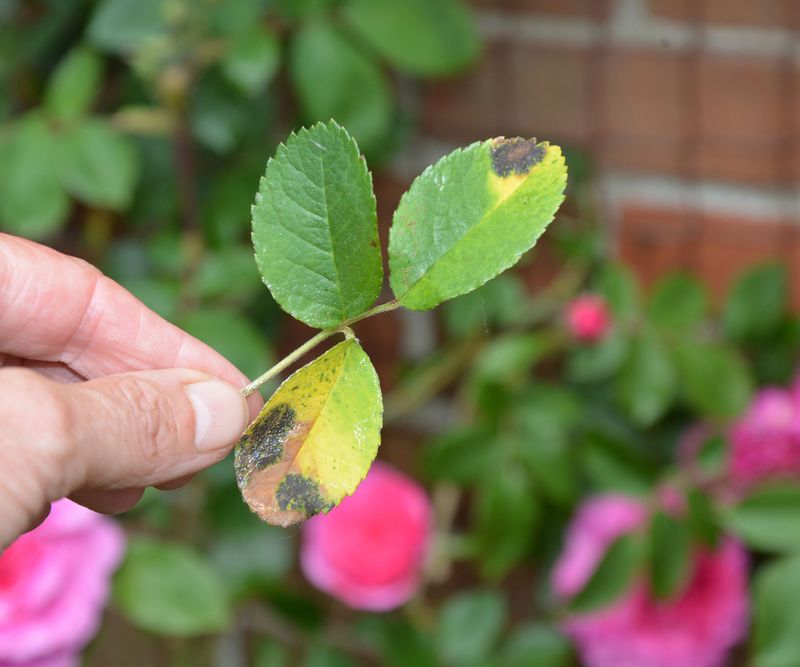
Those crunchy, speckled leaves piled under your roses are more than an eyesore for your winter garden beds. The black spot fungus spends the cold months tucked inside them, ready to launch spores next spring.
Scientists call the culprit Diplocarpon rosae, and it survives winter mainly in fallen foliage and infected canes. When rain splashes those old leaves, spores hitch a ride straight onto fresh, tender growth above.
I like to grab a leaf rake and a sturdy trash bag on a dry afternoon. Gather every leaf you can find, including the sneaky ones hiding against fences and under nearby shrubs.
You might want to think twice about tossing these leaves onto the compost pile with your kitchen scraps. Home compost often fails to get hot enough to reliably break down the fungus before spring arrives.
Bag the debris and set it out with your household trash, or follow your local yard waste rules. Some towns accept bagged yard waste for municipal composting, which usually runs much hotter than backyard piles.
Don’t stop after one sweep, because roses keep dropping leaves well into late fall and early winter. A quick pass every week or two keeps the bed tidy and leaves the fungus far fewer hiding spots.
Stubborn leaves deserve special attention, since some of them cling to canes right through the coldest weeks. NC State Extension suggests stripping off remaining leaves during dormancy, so pluck those spotty holdouts by hand.
2. Prune Black Spotted Rose Canes Well Below The Damage
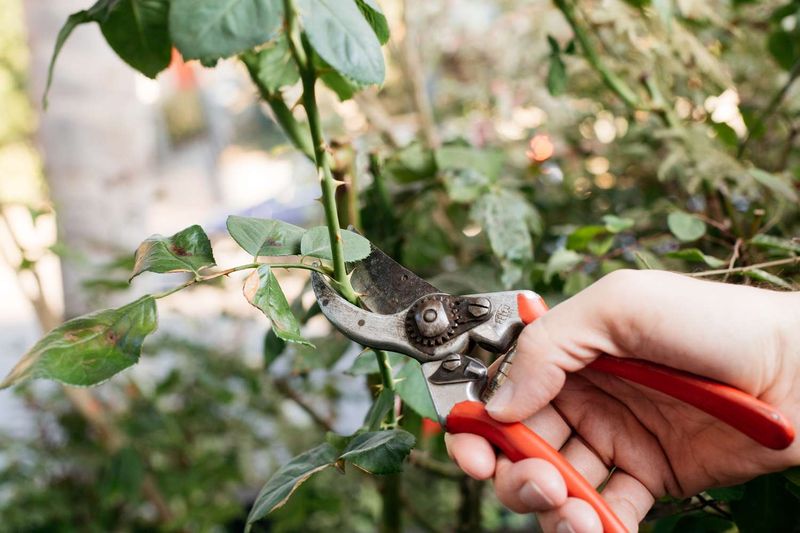
Purple-black streaks on a green cane look like someone smudged it with a marker, and they matter. Those raised blotches are cane lesions, and the black spot fungus happily overwinters right inside them.
Leaving infected canes on the bush is like leaving a tiny spore factory parked in your garden. Once spring rains finally arrive, those lesions can release spores onto the brand-new leaves right beside them.
Late winter, just before buds swell, is the ideal moment for most rose pruning across the Piedmont. Many growers in North Carolina aim for mid to late February, though mountain gardeners often wait longer.
Cut each infected cane at least six to eight inches below the last visible lesion you can spot. That extra margin helps catch fungal growth that may be hiding just beyond what your eyes notice.
I like making each cut about a quarter inch above an outward-facing bud for a tidy shape. Angle the cut slightly so rainwater slides away instead of pooling on the fresh, open wound surface.
Look closely at the center of each cut cane, where healthy wood shows a creamy white pith. Brown or shriveled pith means you should keep trimming a little lower until clean, pale tissue finally appears.
Bag every single clipping right away, just like the fallen leaves, and keep them out of compost. Your rose may look a bit bare afterward, but it usually rebounds with vigorous, cleaner growth by spring.
3. Clean Your Pruning Shears Between Every Rose Cut
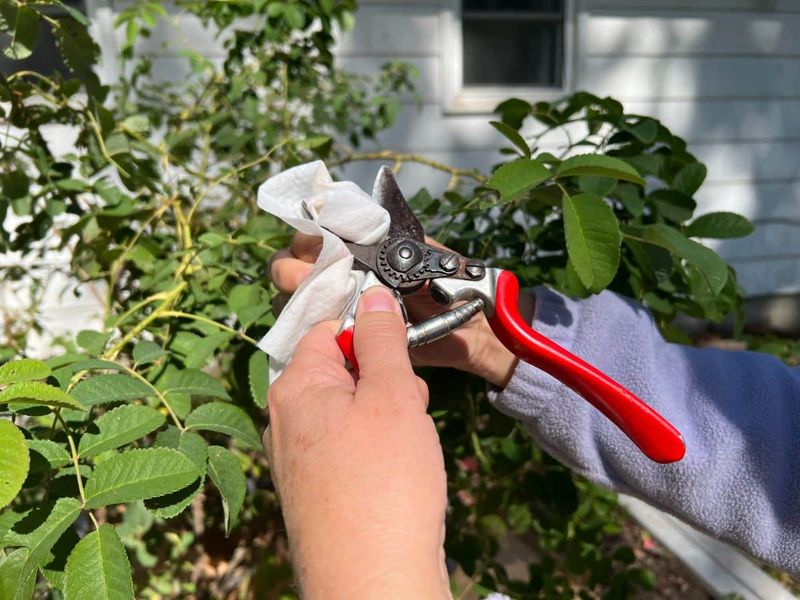
A pair of pruners can carry fungal spores from one rose to the next without you noticing. It surprised me to learn how easily a single snip can move trouble across a whole flower bed.
Blades pick up microscopic spores whenever they slice through infected canes or brush against spotted leaves. Those spores then ride along to your next cut, landing right in a fresh, open wound on the cane.
Keep a small container of disinfectant beside you, and dip or wipe your blades between cuts on sick plants. At minimum, clean them thoroughly before moving from one rose bush over to a healthy neighbor.
A solution of one part household bleach to nine parts water works well and costs pennies to mix. Many gardeners also use disinfecting sprays or wipes, which are easier to carry around the yard.
Bleach can be harsh on metal, so rinse your tools afterward and dry them with an old towel. A light coat of household oil on the blades helps keep rust away during damp winter storage.
Sharp blades matter too, since clean cuts heal faster than ragged ones that crush the cane tissue. I sharpen my bypass pruners every winter, and the difference in how smoothly they slice amazes me.
Make this habit part of your routine, and your roses will thank you with healthier spring foliage. It only adds a few seconds per cut, yet it can save you weeks of frustration later.
4. Open Up Crowded Rose Bushes For Better Airflow
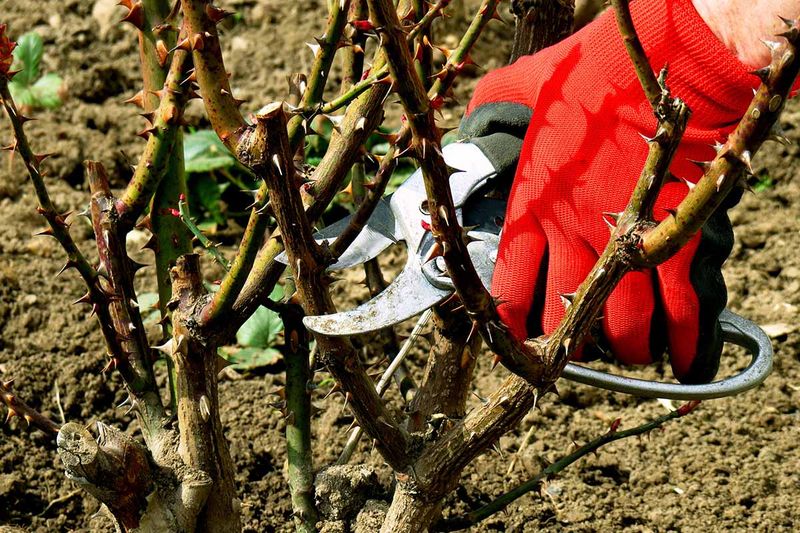
A tangled rose bush holds moisture like a damp sponge, and black spot loves every soggy minute. Opening up the center lets breezes sweep through, drying leaves faster after rain or heavy morning dew.
The fungus needs about seven hours of continuous leaf wetness to infect, so every hour of drying counts. Better airflow shortens that wet window, which can noticeably tip the odds back in your favor all season.
During your late winter pruning, look for canes crossing through the middle or rubbing against each other. Remove the weaker one of each pair, aiming for a vase shape with a nice airy, open center.
Thin, twiggy growth smaller than a pencil rarely produces strong blooms on most hybrid tea roses anyway. Snipping those spindly bits clears clutter and lets the plant focus its energy on sturdier canes.
Spacing matters as much as pruning, and I wouldn’t necessarily say crowded beds look any better anyway. Most roses need about three feet between plants, though larger shrub types may want even more room.
If your bushes are already elbowing each other, consider moving one while it sits dormant this winter. Dig a generous root ball and replant it at the same depth in a roomier, sunnier location.
Nearby perennials can crowd roses too, so give tall companions some real breathing room around the base. A rose with space to sway in the breeze usually stays greener and cleaner through humid summer stretches.
5. Water Roses At The Base With A Soaker Hose
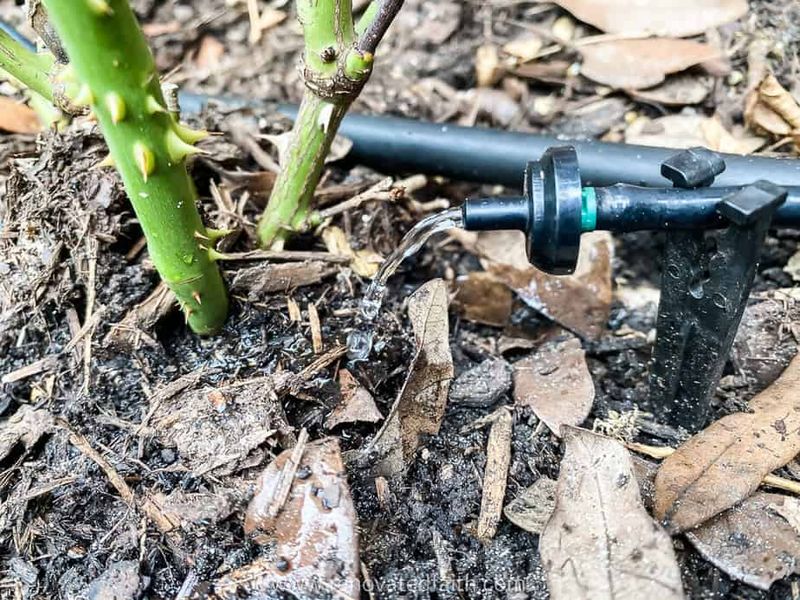
Every drop of water that splashes off a muddy leaf can fling spores onto healthy foliage nearby. That sprinkler arching over your rose bed might look cheerful, but it hands the fungus a free ride.
Splashing water is the main way black spot spreads, and spores need wet leaves to germinate. Keeping foliage dry takes away both the easy transportation and the cozy landing pad the fungus depends on.
Soaker hoses and drip lines deliver water right to the root zone, leaving the leaves nicely dry. Winter is a smart time to lay them out, before spring growth makes the bed harder to reach.
Snake the hose in a loose loop around each bush, a few inches out from the canes. Tucking it under mulch hides it from view and helps the water soak in slowly and evenly.
Hand watering works fine too, as long as you aim the hose nozzle low at the soil. A watering wand with a gentle shower setting lets you soak the base without blasting mud upward.
If overhead watering is truly your only option, do it early in the morning on sunny days. Leaves then have several hours to dry in the sunshine before evening, when cooler air lets moisture linger.
Roses generally like about an inch of water weekly, so check soil moisture before turning anything on. Deep, less frequent soaking encourages stronger roots than quick daily sprinkles that barely wet the surface.
6. Spread Fresh Pine Straw Mulch Around Rose Bushes
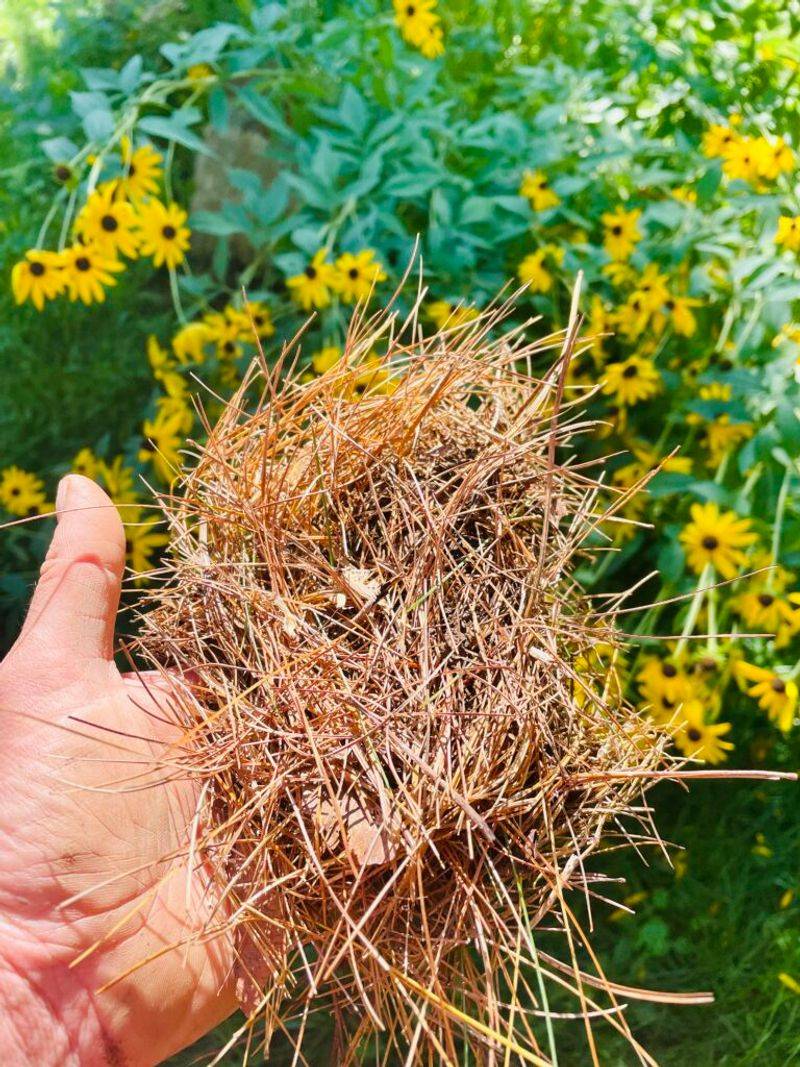
A fluffy layer of mulch works like a soft umbrella, catching raindrops before they bounce spores upward. Bare soil under roses acts more like a trampoline, flinging fungus straight onto the lowest leaves.
Black spot often shows up first on the bottom of the plant, which makes perfect sense once you see splashing. Those lower leaves sit closest to the ground, where infected debris and spores tend to gather.
If black spot plagued your roses this year, pull back the old mulch before adding anything new. That worn layer may be holding infected leaf bits, so bag it up along with your other debris.
Rake the soil surface lightly, then spread two to three inches of fresh organic mulch around each bush. Pine straw is a classic choice here in North Carolina, and shredded hardwood bark works nicely too.
Keep the mulch pulled back two to three inches from the canes so moisture doesn’t collect there. Piling it against the base can invite crown rot, which is a headache nobody wants to handle.
Mulch also insulates roots during chilly snaps, which helps roses come through winter in better shape. In colder mountain areas, some growers mound extra mulch over the bud union for a little added protection.
I’m endlessly pleased by how polished a freshly mulched rose bed looks on a crisp winter morning. That neat look is a bonus, though the real reward shows up as cleaner leaves next summer.
7. Trim Back Shade Trees So Roses Soak Up Sun

Sunshine is the cheapest fungicide you’ll ever find, and roses soak it up like sunbathers at the beach. Strong light dries dew and raindrops quickly, cutting short the wet spells black spot needs to get started.
Most roses want at least six hours of direct sun daily, and eight hours is even better. Roses tucked into shady corners often stay damp longer, so they tend to struggle with leaf spots.
Morning sun deserves special praise, because it burns off overnight dew before the day heats up. An eastern or southern exposure usually gives roses that early boost along with plenty of afternoon light.
Winter is a revealing time to study your yard, since bare branches show exactly where shadows fall. Keep in mind that leafy summer canopies will cast much heavier shade than those bare limbs do now.
Trimming low limbs on nearby trees or shrubs can let surprising amounts of extra light reach your roses. For big trees, hiring a certified arborist is the safest choice, especially near power lines or houses.
Sometimes the smarter move is relocating the rose itself while it rests dormant during the colder months. You might be surprised by how quickly a struggling bush perks up after moving into brighter light.
Sun alone won’t stop black spot during a rainy week, but it stacks the odds in your favor. Pair good light with the other cleanup steps, and your roses get a much stronger start next season.
8. Apply A Winter Dormant Spray To Bare Rose Canes
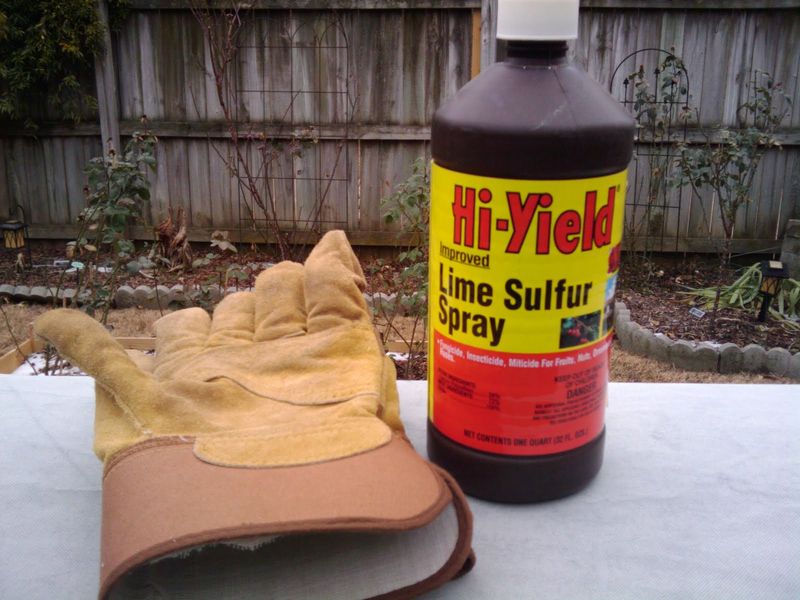
Bare winter canes might look clean, yet tiny fungal spores can still cling to bark and surrounding mulch. A dormant spray gives you one last chance to knock those stowaways back before spring growth begins.
Lime sulfur is a long-trusted dormant treatment, and many rose growers in North Carolina rely on it. It has a strong rotten-egg smell, so I suggest spraying on a calm day with windows closed.
Timing matters, so wait until roses are fully dormant after several hard freezes have finally passed through. For much of the state, that usually means December or January, depending on your local weather and elevation.
Spray the canes thoroughly, and coat the mulch and soil beneath each bush while you are there. Some experienced rosarians add a contact fungicide like chlorothalonil and a spreader sticker to the sprayer tank.
If black spot hit hard this year, a second application a few weeks later may really help. Read the product label carefully, since mixing rules and timing can vary between different brands and formulas.
Lime sulfur can harm tender green leaves, so skip it once buds begin swelling in late winter. Wear gloves and eye protection too, because the spray can irritate skin and eyes on direct contact.
I find this final step oddly satisfying, like tucking the garden into bed with a clean blanket. No spray works miracles alone, but combined with good cleanup, it gives roses a fresher spring start.