9 Smart Ways Indiana Gardeners Can Reuse Old Potting Soil
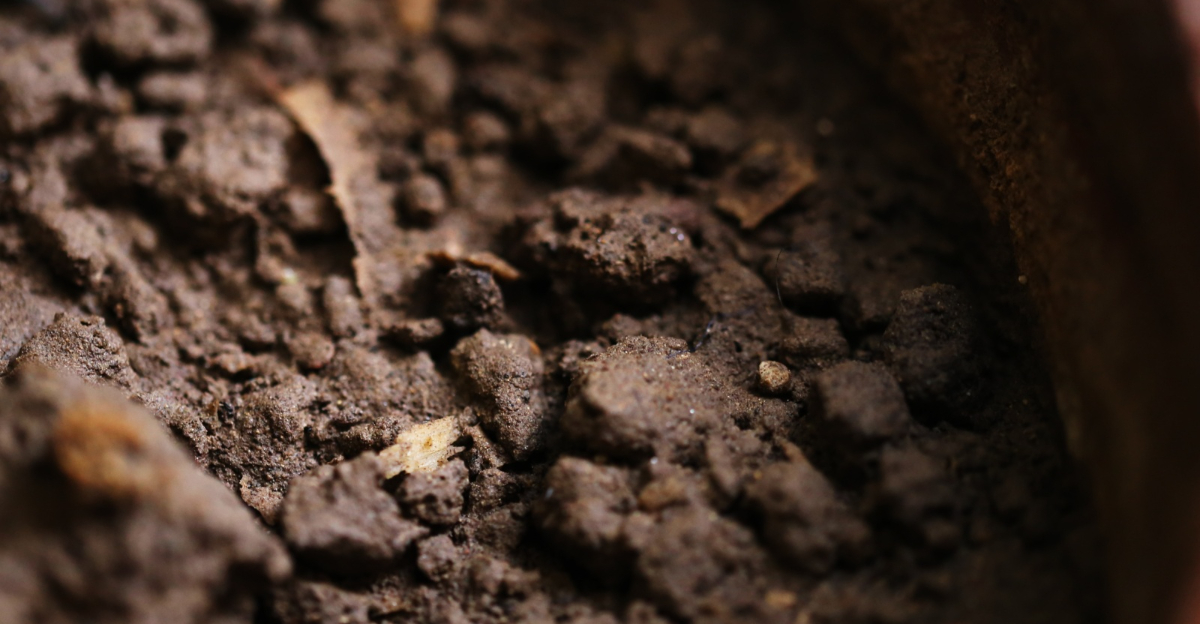
Sunlight cut through the garage dust one morning. There it was: a slumped bag of last season’s potting soil wedged behind the lawn mower.
It looked utterly defeated and completely forgettable. Most people would haul it to the curb without a second glance.
That almost happened here, too, until a dried-out tomato container and an empty wallet forced a much closer look. What if that exhausted soil still had something valuable left to give?
Turns out, it absolutely did. Indiana summers punish plants without mercy, and Indiana gardeners know better than to waste anything the growing season hands them.
That battered bag held organic matter, trace minerals, and microbial life that no fresh bag from any local garden store could replicate.
A few simple techniques transformed it into a resource stretching across containers, raised beds, and garden patches without spending a single dollar. Your best garden season might already be sitting in your garage.
1. Sterilize It By Solarizing Or Baking It

Used potting soil can harbor fungus gnats, mold spores, and pathogens that are impossible to see. Sterilizing it before reuse is one of the smartest moves a home gardener can make.
Skip this step and your new seedlings could be starting with an invisible disadvantage. Solarizing is the easiest outdoor method.
Spread your old mix in a thin layer on a black plastic tarp, cover it with another sheet, and let the sun do the heavy lifting.
After four to six weeks of direct heat exposure, most harmful organisms are significantly reduced. Baking works faster when you need soil ready in a hurry.
Spread the mix in a metal roasting pan, cover it with foil, and heat it in your oven at 200 degrees Fahrenheit for about 30 minutes.
Your kitchen might smell a little earthy, but the results are worth it. One important thing to keep in mind: sterilizing removes harmful organisms but can also reduce beneficial microbial populations in the process.
That means you will need to re-amend the soil with compost or a balanced fertilizer before planting. Think of it as hitting the reset button on a mix that has already done one full season of hard work.
Once sterilized, store the soil in sealed, labeled containers until you are ready to plant. Your seedlings will thank you before they even sprout.
2. Toss It Into Your Compost Bin

Old potting soil is one of the most overlooked compost ingredients. It adds bulk, balances moisture, and gives your pile the structure it needs to break down efficiently.
Most gardeners never think to add it, and that is a missed opportunity every single season. When you dump spent soil into the bin, it acts like a sponge.
It soaks up excess moisture from fruit scraps and wet leaves, which prevents the sour, slimy mess that makes people give up on composting.
A drier, airier pile breaks down faster and smells considerably better. There is another benefit that does not get enough attention.
Your Indiana Garden Changes Every Week. Your Plan Should Too.
Gardening in Indiana changes quickly throughout the season. Every Friday you’ll receive a simple weekly plan showing exactly what to plant, prune, fertilize, harvest, and protect so you never miss the right timing.
Old potting mix often still contains slow-release fertilizer pellets and perlite. Those materials cycle back into your finished compost, adding useful texture and nutrition to the final product.
As a general guideline, one part old soil to three parts green and brown compostable material works well for most backyard piles.
Layering matters here, so alternate the old mix with food scraps, cardboard, and dried leaves. That technique keeps airflow moving through the pile and speeds up decomposition significantly.
By the time your compost is finished, that old potting soil has transformed into something genuinely rich and useful. Your garden beds will feel the difference with the very first shovelful.
3. Amend It And Reuse It In Containers

Spent potting mix is not finished. It just needs a little help getting back in shape.
Amending and reusing it in containers is one of the most budget-friendly moves in the gardening world.
With a few simple additions, that tired mix can perform close to a brand-new bag. Start by removing any old roots, debris, or clumps left from the previous season.
Breaking up compacted chunks by hand improves aeration before you even add anything new. This physical refresh alone can make a noticeable difference in how roots move through the soil.
Next, blend in about one-third fresh compost to restore organic matter and microbial activity. A handful of perlite or coarse sand improves drainage, which matters during heavy Indiana rain.
A slow-release granular fertilizer rounds things out and feeds plants from the first week of growth. Containers are the perfect place to reuse amended soil because you control every variable.
No competing weeds, no unpredictable ground drainage, just a contained environment where your refreshed mix can shine. Tomatoes, herbs, and annual flowers all respond well to a freshened-up container blend.
Reusing soil this way can generate meaningful savings each season, depending on how many containers you maintain and which brands you typically buy.
That adds up quickly over a few years of serious container gardening. Small savings with big results is what smart Indiana gardening is all about.
4. Fill Lawn Holes And Divots With It

Lawn divots and sunken patches seem minor until you twist your ankle stepping into one. Old potting soil turns out to be a surprisingly effective filler for uneven spots across your grass.
Most people just ignore those low patches, but a better solution might already be sitting in your garage. The process is straightforward and takes less than an afternoon.
Loosen the existing soil in the divot with a garden fork, then fill the depression with your old potting mix until it sits just slightly above the surrounding lawn level, making sure grass blades are still visible and not fully buried.
Tamp it down lightly so it does not wash away in the next rain. Potting soil works well here because it tends to be lighter and more porous than native Indiana clay.
That porosity helps the area drain properly instead of creating a soggy low spot after every storm. Grass roots also push through it far more easily than compacted clay-heavy ground.
Sprinkle a little grass seed over the filled area if the existing turf is thin or patchy. Keep it lightly watered for a couple of weeks and the new growth will blend right in with the surrounding lawn.
By midsummer, you will barely be able to tell there was ever a problem. This hack is especially useful after a harsh Indiana winter, when freeze and thaw cycles leave the yard looking uneven.
Fixing those spots early in spring gives the grass the best chance to fill in before the heat arrives. A smooth lawn starts with what you already have on hand.
5. Mix It Into Your Garden Beds

Heavy clay soil is the nemesis of almost every backyard gardener. Mixing old potting soil into your garden beds loosens dense ground and improves how water and air move through it.
You are essentially giving your plants a better environment to grow up in. Spread two to three inches of your spent potting mix across the surface of the bed before planting.
Work it in with a spade or garden fork to a depth of about eight to ten inches. That blending action breaks up clay clumps and creates a more open, workable texture throughout the root zone.
Old potting mix often still contains organic matter, even when nutrients have been mostly depleted. That organic material feeds soil microbes, which in turn build better soil structure over time.
Think of it as a long-term investment rather than a quick fix. For vegetable beds, pair the old mix with a layer of fresh compost to replace lost nutrients.
Many established flowers and shrubs are more forgiving and often perform well with the amended blend on its own, though heavy feeders may still benefit from added fertilizer.
Either way, your beds end up with better drainage and a softer texture for roots to explore. Doing this every spring is a habit that compounds over the years.
Each season, the soil gets a little richer, a little looser, and a little more alive. Gardening stops feeling like a battle against the ground and starts feeling like a partnership with it.
6. Spread It As Topdressing Over Seeds

Tiny seeds need the right surface to germinate successfully. Compacted or crusted soil can stop them before they even get started.
Spreading a thin layer of old potting mix as topdressing gives seeds exactly the loose, consistent surface they need. Apply the old mix in a layer no thicker than a quarter inch directly over your seeded area.
Too thick and you block light from seeds that need it to sprout. Too thin and you lose the moisture-retention benefit that makes topdressing worth doing in the first place.
Old potting soil works especially well here because it has already broken down and is free of large chunks or debris.
That fine, even texture creates consistent contact between seed and soil, which is what triggers germination.
Carrot seeds, lettuce, and wildflower mixes all respond particularly well to this method across Indiana gardens.
Late spring Indiana winds can dry out freshly seeded beds faster than expected. A topdressing layer acts like a light blanket, holding moisture close to the seed while still allowing airflow.
You end up watering less frequently and losing fewer seeds to dry spells between rain events. Pair this with a light misting from a watering wand each morning and you have created near-ideal germination conditions.
Seeds may germinate noticeably faster, though results will vary by variety and weather. That head start matters when the Indiana growing season is already short.
7. Use It To Improve Bed Or Container Drainage

Soggy roots are one of the fastest ways to ruin a plant. Improving drainage in raised beds and containers is a foundational fix that changes how well your entire garden performs.
Old potting soil, especially mixes already containing perlite or bark, is a natural choice for this job.
Make sure your container has working drainage holes so water can fully escape. Used potting soil is looser and more porous than native ground, encouraging water to move downward rather than pool around roots.
This layering technique works especially well for tropical plants and succulents that are sensitive to wet feet. In raised beds, drainage issues often show up as standing water after heavy rain.
Working old potting mix into the lower layers introduces air pockets that help excess water escape more quickly. Focus on the bottom six inches where drainage matters most.
Mixing in a little coarse sand or extra perlite alongside the old soil boosts this effect even further. Think of it as building an underground drainage system that quietly does its job every time it rains.
Plants above have no idea how much work is happening beneath them. Good drainage supports a healthy root system, and a healthy root system supports everything else.
This hack costs nothing extra and takes about twenty minutes. That is a solid return on investment for any backyard grower.
8. Store It For Next Season

Tossing old potting soil once the season ends is an easy habit to fall into. Storing it properly means you start next spring with a ready-to-use resource.
A little end-of-season effort pays off significantly when planting season arrives. Start by removing any spent plant material, roots, and debris from the mix before storing.
Break up large clumps and let the soil dry out slightly so mold does not develop over winter. Damp stored soil invites fungal problems that will greet you in the worst possible way come early spring.
Transfer the cleaned mix into heavy-duty plastic storage bins or sealed garbage bags. Label each container with the date and any notes about what grew in it last season.
That information helps you decide whether to amend it heavily or use it as-is when spring arrives. Store the bins in a garage, shed, or basement where temperatures stay relatively stable.
Extreme freeze and thaw cycles can degrade the structure of the mix and make it harder to work with the following year. A sheltered spot protects your investment without requiring any extra effort.
Come spring, pull out your stored soil, give it a smell test, and assess its texture. If it smells earthy and crumbles easily, it is ready to be refreshed and put back to work.
Starting the season with stored, amended soil gives the whole garden a head start from day one.
9. Top Off Your Raised Beds With It

Raised beds sink more than most gardeners expect. After one full growing season, organic material breaks down and soil levels can drop two to four inches.
Topping off with old potting soil is the fastest and most affordable fix for this common problem. Spread the old mix across the surface of the bed in a layer thick enough to bring the soil level back up to within an inch or two of the top edge.
Fluff it lightly with a rake or your hands to blend it with the existing surface layer. You do not need to dig it in deeply because earthworms and rain will handle that work over time.
Old potting soil is ideal for topping raised beds because its texture is already broken down and spreads evenly. Freshly bagged soil can be chunky and hard to distribute without creating air pockets.
A well-used mix settles in naturally and integrates with what is already in the bed. Add a layer of compost on top of the old soil to restore nutrients before planting.
That two-step approach, old soil for volume and compost for nutrition, gives you a fully refreshed bed without spending a fortune.
Many gardeners notice improved growth and better soil texture in their beds after this simple seasonal reset. Raised bed gardening is already one of the best ways to work around challenging soil and extend your growing season.
Keeping those beds topped off and healthy is what separates a good harvest from a great one. Old potting soil, it turns out, is one of the most valuable things already sitting in your yard.